• Our booking engine at tickets.railforums.co.uk (powered by TrainSplit) helps support the running of the forum with every ticket purchase! Find out more and ask any questions/give us feedback in this thread!

Night Photography

Status
Not open for further replies.

Crossforth

Established Member
Joined
20 Aug 2009
Messages
1,337
Location
Lancashire
Hey Guys

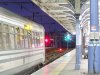
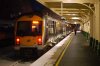
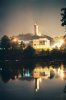
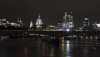
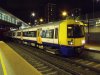
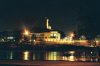
As many of you will be able to tell from my fotopic, I don't tend to take make shots during the darker hours of the day. This is because I do not know how to set the camera to take a clear image at night.

Can anybody help with what I need to change in the way of aperture and exposure timings to get a clear image at night?

Any help I will be great full for. :D
 
Sponsor Post - registered members do not see these adverts; click here to register, or click here to log in
R

RailUK Forums

Peter Mugridge

Veteran Member
Joined
8 Apr 2010
Messages
14,829
Location
Epsom
Longer exposures with smaller appertures tend to produce very sharp night shots, the smaller the apperture the better. But it is impossible to be specific because the illumination at each station is different.

Generally speaking, you may get away with ASA200 at f4 or f5.6 for 1 second at the brighter lit terminals, and for 1 second you should even be able to physically hold the camera firm against something like a roof pillar without having to resort to a tripod.

One unfortunate consequence of the switch from strip lights everywhere to the current highly intensive cluster lights since NR replaced Railtrack is that, sadly, you can no longer get that nice warm greenish atmospheric tint to the illumination of the scene any more.
 

will1337

Member
Joined
5 Feb 2008
Messages
613
Location
Laaandaaan
Crossforth, which camera do you use? For night with good artificial lighting and static subject I'd go to 1/10th at f4 and ISO3200 which is fine for internet jpgs and smaller prints. If you have a shallower subject then you can get away with a larger aperture, up to about f2. IS/SR is recommended. Any darker will need a support or tripod, as will using a telephoto lens.

Freezing action is difficult without having a top DSLR capable of very high ISOs so that you can up the shutter speed.
 

K9-70

Member
Joined
10 Oct 2010
Messages
84
Location
Belfast, N.Ireland
Using a high ISO/ASA setting will result in a very grainy image.
The photo attached was made on my way to work.

Nikon D100
Nikkor "D" 50mm f1.8
200asa f2 @ 1/10th Sec
Spot metering
Shutter Priority
No Flash
Hand held

K9-70
 

Attachments

  • 3017 Lisburn 17-12-2010.jpg
    3017 Lisburn 17-12-2010.jpg
    161.6 KB · Views: 86

Track Basher

Member
Joined
27 Nov 2010
Messages
238
Location
Highlands of Scotland
Night photography is not easy It was easier with film as the results were similar as you were exposing chemicals to light.

With digital is more difficult as it is down to the camera and sensor. I have found that you need to expose more with digital.

Key rules:

  • Camera has to have Manual or B setting
  • Lens with fewer elements (fixed focal length) possible with a zoom lens but more chance of light bouncing around between the elements
  • Low ISO typically 200 ISO or you get graining
  • Tripod
  • Shutter release cable (you can also use the self timer with delay and manual settings)
  • Set Apature to F8 or smaller (larger numbers)
  • Shutter speed 10 sec but this is variable according to the amount of ambient light you have to have some light on the front/side of the train otherwise you will never get a decent result. The length of exposure required can vary considerably depending on the make of camera

A useful trick is set the camera in manual on a tripod with a subject you can take a few photos of. Set the apature to F8, ISO 200 then start and 1 second exposure and keep increasing this one stop at a time 2 sec taking a number of photos at different settings. What is good with digital all the settings are recorded in the EXIF data. You can see this on your computer once you get home.

You can work out which settings have worked best. You can then get a feel for what settings you should be using. The reality of night photography is that you have to be extremely talented to get this right with one photo alone. It takes a number of photos with different exposures to get the one shot that is perfect.

The one below took me several months of trial end error to get right with different settings and waiting for the train to stop in the correct position so that the loco was sat in a pool of light. This particular night was well below zero and a stood for an hour freezing my bits off waiting for it to move forward to the correct position. The wait was worth it and a made a few quid out of it as well. All you see here however is the one perfect shot not the 30 or so other ones that were not as good.

66079 Onllwyn
 

At_traction

Member
Joined
5 Aug 2010
Messages
291
Night photography is not easy It was easier with film as the results were similar as you were exposing chemicals to light.

With digital is more difficult as it is down to the camera and sensor. I have found that you need to expose more with digital.

On the other hand, with digi you can see immediately the effect of changes to exposure settings, whereas with film you had to wait until the processing had been done and you were then possibly hundreds of miles away at home, with little chance for a retake. Thus, bracketing, bracketing and bracketing. Expensive stuff. ;)

Don't know (ie. too lazy to make a 10 sec. Google check ;)) if digi has the nighttime exposure reciprocal effect that dogged film, making the approximation even harder to carry out.

[*]Camera has to have Manual or B setting
[...]
[*]Shutter release cable (you can also use the self timer with delay and manual settings)

When too lazy to screw in the cable shutter, I've been able to get away with steadying the camera on the tripod by pressing it down (gently) and pressing the shutter with finger carefully - if needed, also lifting the mirror beforehand to decrease shake further.

All you see here however is the one perfect shot not the 30 or so other ones that were not as good.

So, would have been the same as one 36 roll film expended there in the olden times...

H*ll, I'd have to get the film camera shutter fixed someday... Requires a lottery win, tho'. :|
 

90019

Established Member
Joined
29 May 2008
Messages
6,825
Location
Featherstone, West Yorkshire
So, would have been the same as one 36 roll film expended there in the olden times...

H*ll, I'd have to get the film camera shutter fixed someday... Requires a lottery win, tho'. :|

With night shots on film, I just sit it on the tripod, make it up as I go along and see what happens :D

They've generally come out alright. No railway night shots yet though.
 

Attachments

  • CNV00020.jpg
    CNV00020.jpg
    170.8 KB · Views: 29
  • CNV00022.jpg
    CNV00022.jpg
    136.2 KB · Views: 25
  • CNV00001.jpg
    CNV00001.jpg
    245.4 KB · Views: 24
  • CNV00004.jpg
    CNV00004.jpg
    80.2 KB · Views: 22

Crossforth

Established Member
Joined
20 Aug 2009
Messages
1,337
Location
Lancashire
This is brilliant guys :D

I am out doing Red Dot Day on Wednesday and of course it will get dark early so I may use that as my first opportunity to get some night shots :D

And the shots that have been shown are brilliant, thanks :D
 

Peter Mugridge

Veteran Member
Joined
8 Apr 2010
Messages
14,829
Location
Epsom
H*ll, I'd have to get the film camera shutter fixed someday... Requires a lottery win, tho'. :|


If it's any help, I know a place where film cameras can be repaired at reasonable cost ( so long as the parts are available of course, but in most cases they will be). Look here: www.harrowtechnical.co.uk

The bloke is very reliable; he used to work for Pentax. When they moved out, he stayed put and rented an office and set himself up as an independent repair specialist. Any make.
 
Last edited:

kentuckytony

Member
Joined
23 Aug 2010
Messages
283
Location
Edgewood KY USA
If you want to see - and read - what O. Winston Link had to do to get fantastic night shots back in 1955-1959, buy or borrow a copy of The Last Steam Railroad in America.

His night shots are so good!
 

windoze11

Member
Joined
9 Feb 2010
Messages
398
Heres a Night photo I Took recently with
a Nikon d90
Iso 200
30 sec exposure
F/16

DSC_0122.gif


St Lawrence Church Scunthorpe
 

blackfive460

Member
Joined
23 Jun 2010
Messages
829
The wonderful thing about digital photography is that, actually taking pictures, costs virtually nothing so the thing to do is have a go.
It doesn't matter if you don't know what to do. Just have a go and take lots of pictures. Try a range of settings. See what works.
No tripod handy? Doesn't matter. Find something to lean against or a handy wall or seat or whatever and take lots of exposures. You may get nothing but then again, you may get one good one out of the batch.
Like the one below. Exposure was 1 sec f/3.5 200 ISO. No tripod, just supported on the bridge parapet. The camera (Canon 720IS) has image stabilisation but at that sort of exposure time it isn't really effective.
Of course, you wouldn't want to see the other dozen attempts...
Completely agree about Link's work. Not just amazing pictures but the effort that went into getting them was quite remarkable. He had the knack of making his night shots look like photos taken in the dark rather than some more modern efforts that I've been seeing where the photographer seems to be trying to make night into day and loses all the atmosphere!
 

Attachments

  • 2010-1618.jpg
    2010-1618.jpg
    74.2 KB · Views: 35

At_traction

Member
Joined
5 Aug 2010
Messages
291
He had the knack of making his night shots look like photos taken in the dark rather than some more modern efforts that I've been seeing where the photographer seems to be trying to make night into day and loses all the atmosphere!

Agreed, but on the other hand, I have a perverse fascination for the technique of painting with flash w/ very long exposure times. That's what I'd call trial and error... 8-)
 

Track Basher

Member
Joined
27 Nov 2010
Messages
238
Location
Highlands of Scotland
On the other hand, with digi you can see immediately the effect of changes to exposure settings, whereas with film you had to wait until the processing had been done and you were then possibly hundreds of miles away at home, with little chance for a retake. Thus, bracketing, bracketing and bracketing. Expensive stuff. ;)

Don't know (ie. too lazy to make a 10 sec. Google check ;)) if digi has the nighttime exposure reciprocal effect that dogged film, making the approximation even harder to carry out.


When too lazy to screw in the cable shutter, I've been able to get away with steadying the camera on the tripod by pressing it down (gently) and pressing the shutter with finger carefully - if needed, also lifting the mirror beforehand to decrease shake further.


So, would have been the same as one 36 roll film expended there in the olden times...

H*ll, I'd have to get the film camera shutter fixed someday... Requires a lottery win, tho'. :|

You have slightly missed the point I was trying to get to, which is probably my explanation.

The point was that when using film it was more forgiving and you only had to get the exposure somewhere near and you would end up with a good shot. You did not have to take multiple exposures. I agree in reality you would not take multiple exposures, as you did not have to and as you correctly say it would cost a fortune. The main difference here is that there was no electronic gadgetry interfering in the process. Regardless of the camera used it was down to the chemical on your choice of film. The only other thing involved was the light coming through the lens. You are quite correct you had no idea what settings you had used several weeks/months later whan you got them back. It was much more difficut to improve but once you had somewhere near the right exposure it generally worked.

My experience is that digital is much less forgiving than film was. You are at the mercy of the software used by the sensor and the sensor it's self. This can vary considerably between manufacturer and I find it is more difficult to get right but quite rightly the cost of taking extra shots is next to nothing. You have to either backet or take multiple shots. I prefer the latter as I am in control and know what I intend rather than leaving it to the camera software.

I have also found that the preview window on the camera can mislead you. It gives you a good indication of the correct exposure but because of the small screen you often cannot see camera shake and blurred images. What appears to be perfect is not. It is only when you get them home and look at the 100% size on the computer the full extent of the problems are revealed.

Some other good points you can raise the mirror before taking the shot, I personally don't use this as one you have done it you can't see what you are taking the picture of, if you are using a DSLR. An alternative trick, if you don't have a shutter cable, is to put the camera on self timer and manual exposure something like 10sec F8 this way the shake from pressing the shutter has gone by the time the shutter releases. I have used this method as you ahve better camera control. You cannot use this method with the camera on Bulb (B).

There are a number of people on this thread all with very good hints and tips. We could sit here and give lots of good advice but I am afraid there is only one way to find out. Get out there and give some of it a try. Not all of it will work for everyone but go and see what does.
 

At_traction

Member
Joined
5 Aug 2010
Messages
291
The point was that when using film it was more forgiving and you only had to get the exposure somewhere near and you would end up with a good shot. You did not have to take multiple exposures. I agree in reality you would not take multiple exposures, as you did not have to and as you correctly say it would cost a fortune.

The choice of film back then could be a notable factor here; with slide films, the latitude of the film being perhaps as much as two-three stops less than with print stock, the margin for exposure was more acute. Moreover, without ciba processing or duplicated internegatives etc., the final product with slide was just that, the one you took through the lens, whereas with print there was the possibility to fidget with the result (within reason, and much easier with b/w ;)) somewhat like with digital.

The main difference here is that there was no electronic gadgetry interfering in the process. Regardless of the camera used it was down to the chemical on your choice of film. The only other thing involved was the light coming through the lens.

I, on the other hand, noticed that there were minute variations between shots taken at differing, "nominally" equivalent, combinations of shutter speed and aperture. Greycard shots with b/w at shutter/aperture combinations that, in principal, would let a similar amount of light to the film could be visibly differing in tone (Canon EF (the 1973 one ;)) + Canon FD 50mm f1.4). Shutter itself didn't seem to suffer too badly, but the combinations were remarkebly affected. Although not necessarily an issue with half-minute exposures, such discrepancies could affect the result when playing with different combinations.

My experience is that digital is much less forgiving than film was. You are at the mercy of the software used by the sensor and the sensor it's self. This can vary considerably between manufacturer and I find it is more difficult to get right but quite rightly the cost of taking extra shots is next to nothing. You have to either backet or take multiple shots.

But once you know the "characteristics" of the make+model, this variable is largely removed. Hopefully.

I have also found that the preview window on the camera can mislead you. It gives you a good indication of the correct exposure but because of the small screen you often cannot see camera shake and blurred images. What appears to be perfect is not. It is only when you get them home and look at the 100% size on the computer the full extent of the problems are revealed.

At least I have a possibility to zoom in threefold (with a 1998 camera :lol:), which in fact shows rather well the sharpness in key areas, as long as the window is scrutinized in darkish surroundings, not in direct sunlight. Underneath jacket and such...

Some other good points you can raise the mirror before taking the shot, I personally don't use this as one you have done it you can't see what you are taking the picture of, if you are using a DSLR.

The key, of course is to frame the subject (w/ tripod) beforehand. I also used (and will use, once the shutter is fixed...) an external spotmeter and a sort of "zone system" for exposure beforehand. Daylight thingies of course.
 

Track Basher

Member
Joined
27 Nov 2010
Messages
238
Location
Highlands of Scotland
We are getting into quite an intense discussion of agreement here. I cannot disagree with what you say all are good points and advise.

My experience is mainly in 35mm slide which I took for many years and got to understand perfomance fairly well so cannot comment on the other areas as I have had little experience. I think what we are getting to in the discussion are that with both film/slide colour/B&W and digital there are variations. The only way to find out what works and what doesn't is to get out there with your camera and give it a go. Take lots of photos of the same subjects with different settings then go home and examine what has worked and what has not.

With what everyone has said here should give you some settings to start with. If you get it right night photography can give spectacular results.
 

Royal Male

Member
Joined
28 Aug 2010
Messages
50
Location
near a dissused station on the Hull to Scarborough
Myself I like to use a tripod, and the lowest iso that my camera will go which is ISO 100 (asa 100 in old money and showing my age) on my eos 40d. Usually working around F8 or thereabouts depending on light levels. The great thing about digital is the learning curve, and you need not wait a week to find out you wated your money and your time with washed out or black underexposed shots. I agree with a previous poster in that film did give you a better lattitude, but with modern editing, it is possible to work on shadows and highlight errors, well a little bit anyway.

I have no prblem cranking the iso up nowadays as the image sometmes looks better with a bit of noise and grain. One shown below taken at iso 320 and handheld ( exif is available in the shot)


976241306_v6HCc-S.jpg
 

TGVDUDE

Member
Joined
1 Jan 2009
Messages
1,041
Location
Cheltenham
from my expirience with my bog standard 18-55mm f3.5-5.6 on my Sony A230, selecting Program Auto with no added Exposure, ISO100 Florescent or Tungsten White Balance (dependant on station) with night creative style give off results like this:
http://peggey707.fotopic.net/p68503487.html

However when taking moving night shots i move to very high ISO(1600), 3200 if needed with shutter speed at 1/320 +2 added Exposure to give pretty pathetic results like this:
http://peggey707.fotopic.net/p68503486.html
http://peggey707.fotopic.net/p68484586.html

But once i purchase the 50mm f1.4 in the not too distant future i plan to capture images like this:
http://dparsons.fotopic.net/p68490991.html

much better ey? all because of the lower apreture (f number)

Lewis M
 

jrhilton

Member
Joined
13 Apr 2009
Messages
116
I would say go down the DSLR route if you have one. On the new Canon and Nikon DSLRs you can use ISO 1200+ and still get much less noise than you had using 400 ISO colour film. There is less reciprocal failure, and more exposure range/latitude than C41 colour or E6 slide film in most new DSLRs too. All of that really helps when it comes to night shots.

It is key to use RAW mode as JPEG compression will mess up the fine detail in a night shot, especially in the shadows.

The only time film wins in my view is if you are shooting b&w and then developing each negative accordingly, so you are limited to sheet film really. The digital side of things hammers home how contrasty most films become when used at night and how much detail you do sacrifice unless you are willing to work hard in the darkroom to get the detail back into the print because of non liner characteristic curves that films have!

Night photography is definitely one of those areas where practice makes perfect. And always use a tripod or something to support the camera on!
 
Last edited:

Crossforth

Established Member
Joined
20 Aug 2009
Messages
1,337
Location
Lancashire
Hey Guys

Here are a couple of shots I took out my bedroom window a few days ago so they aren't of trains yet :D I am quite pleased with the results

The first one:
24/01/2011 at 22:53

F stop: 4
Exposure: 15 seconds
ISO: 64

The second one:
25/01/2011 07:23

F Stop: 3.7
Exposure: 15 seconds
ISO: 64

Thanks for all your help :D
 

Attachments

  • 165779_1742546160132_1133055824_2022524_4532076_n[1].jpg
    165779_1742546160132_1133055824_2022524_4532076_n[1].jpg
    47.3 KB · Views: 24
  • 166481_1743122494540_1133055824_2023668_4527671_n[1].jpg
    166481_1743122494540_1133055824_2023668_4527671_n[1].jpg
    72.3 KB · Views: 21

ChrisCooper

Established Member
Joined
7 Sep 2005
Messages
1,787
Location
Loughborough
Here is a night shot at Norwich station, taken using my fairly cheap Fujifilm Finepix S1500. It's 8 second exposure and ISO64, balanced on something.

Not too bad on hand held either. Taken at Shepherds Bush.
 

Attachments

  • DSCF0972.jpg
    DSCF0972.jpg
    169.4 KB · Views: 25
  • DSCF0376.jpg
    DSCF0376.jpg
    130.9 KB · Views: 34

K9-70

Member
Joined
10 Oct 2010
Messages
84
Location
Belfast, N.Ireland
NIR 80 Class #8082 leaving Great Victoria St working the 17:25pm service to Portadown.

K9-70
 

Attachments

  • 8082 Great Victoria Street 28-01-2004b.jpg
    8082 Great Victoria Street 28-01-2004b.jpg
    105 KB · Views: 26

Peter Mugridge

Veteran Member
Joined
8 Apr 2010
Messages
14,829
Location
Epsom
That's nice - it would make a pretty good 1500 piece jigsaw as well wouldn't it? Have you tried contacting the mainstream jigsaw factories?
 

mumrar

Established Member
Joined
26 Sep 2008
Messages
2,646
Location
Redditch
My latest effort.
Was that taken at an organised night shoot? I find sometimes the very bright subjects and extremely harsh shadows seem off putting. This is why L'm yet to try my hand at it, as I prefer to use what light is around already.
 

Track Basher

Member
Joined
27 Nov 2010
Messages
238
Location
Highlands of Scotland
Was that taken at an organised night shoot? I find sometimes the very bright subjects and extremely harsh shadows seem off putting. This is why L'm yet to try my hand at it, as I prefer to use what light is around already.

You are correct. There was a little artifical help but it still takes an element of skill to get the exposure correct.
 

mumrar

Established Member
Joined
26 Sep 2008
Messages
2,646
Location
Redditch
You are correct. There was a little artifical help but it still takes an element of skill to get the exposure correct.
Don't misunderstand my post to mean I think it's easier. I think the intensity of lighting used these days is too strong, and somewhere in the middle would strike a good balance between the normal station lighting and the extra lighting.

It's sort of like a studio version of HDR shots, and if they are overdone I generally don't like them, but a happy medium is right (in my own opinion).

Back to the general question posed, unless the train is rocking horse poo rare I won't shoot a moving train at night. I prefer static stuff and to use ISO 100 and around f/8-10 for some good 'twinkle' off lighting.
 
Status
Not open for further replies.

Top