• Our new ticketing site is now live! Using either this or the original site (both powered by TrainSplit) helps support the running of the forum with every ticket purchase! Find out more and ask any questions/give us feedback in this thread!

On the Workbench...

4COR

Member
Joined
30 Jan 2019
Messages
682
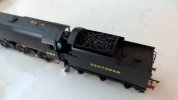
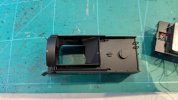
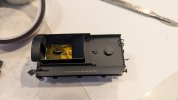
Not one of my engines this, but a bit of work for my dad in fitting a Youchoos sound decoder, speaker and keepalive in one of his SR Q1s.

Easier with it in the tender, but then, needed a bit of surgery to fit the speaker. All nicely hidden beneath some coal (which looks much better than the plastic stuff anyhow I think!)
PXL_20241221_154709735.jpg
PXL_20241221_155400269.jpg
PXL_20241222_153743924.jpg
EDIT: report from Dad that it is brilliant, and exactly how he remembers them as a kid when he used to watch the trains from the footbridge at Guildford in the 50s...
 
Last edited:
Sponsor Post - registered members do not see these adverts; click here to register, or click here to log in
R

RailUK Forums

4COR

Member
Joined
30 Jan 2019
Messages
682
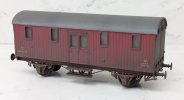
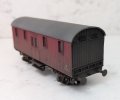
I finally got round to doing some weathering and trying to finish some bits. This ex-GWR P19 CCT is done, bar the couplings... (Which will be interesting as there is a cross handbrake rod exactly where the NEM pocket needs to sit :rolleyes:). I have a few more models that are now not far off so hopefully a few more updates soon.

(Images of a ex GWR CCT, P19 diagram, in BR Crimson - Parkside model PC37)

PXL_20250120_124634704.jpg
PXL_20250120_124122558.jpg

Automerged next post follows:


== Doublepost prevention - post automatically merged: ==

Well, these are mostly done now (I need tyre weights to ballast them, and some NEM couplings to go in the pockets) but painting, transfers are all finished. Shown here with two previous models. In all we have:

Stove BY S402S
CCT S1422S
P19 W563W
BY S762S
PMV S1972S
PMV S1995S


PXL_20250123_233126623.jpg
PXL_20250123_233229788.jpg

I'm looking forward to starting something new - these have been hanging around far too long! I have a Mink G I fancy having a go at.

I am still piddling around with the 3 set of Green Mk1s - down to the interiors now...
 
Last edited:

Cowley

Forum Staff
Staff Member
Global Moderator
Joined
15 Apr 2016
Messages
17,315
Location
Devon
I finally got round to doing some weathering and trying to finish some bits. This ex-GWR P19 CCT is done, bar the couplings... (Which will be interesting as there is a cross handbrake rod exactly where the NEM pocket needs to sit :rolleyes:). I have a few more models that are now not far off so hopefully a few more updates soon.

(Images of a ex GWR CCT, P19 diagram, in BR Crimson - Parkside model PC37)

View attachment 173112
View attachment 173114

Automerged next post follows:


== Doublepost prevention - post automatically merged: ==

Well, these are mostly done now (I need tyre weights to ballast them, and some NEM couplings to go in the pockets) but painting, transfers are all finished. Shown here with two previous models. In all we have:

Stove BY S402S
CCT S1422S
P19 W563W
BY S762S
PMV S1972S
PMV S1995S


View attachment 173348
View attachment 173349

I'm looking forward to starting something new - these have been hanging around far too long! I have a Mink G I fancy having a go at.

I am still piddling around with the 3 set of Green Mk1s - down to the interiors now...

That’s a great little rake you’ve put together there I must say.
 

4COR

Member
Joined
30 Jan 2019
Messages
682
That’s a great little rake you’ve put together there I must say.
Many thanks! I think it stands up even as a rake of 4-6 vans nicely, but think something like a Mk1 GUV, or a 50ft Stanier Full Brake at the end, and a Fruit D or something to accompany the Python would round it off nicely :)
 

Sun Chariot

Established Member
Joined
16 Mar 2009
Messages
3,699
Location
2 miles and 50 years away from the Longmoor Milita
Excellent parcels consist, @4COR 8-) I love the1950s to early 1960s when the rakes were of varying diagrams, origins and colours (notwithstanding the grot on top of green / crimson / maroon / brown!).

My fish rake has gained 3 more pre-built ex-LNER vans. The other kits still require building, which has dropped in priority, below fostering the German Shepherd - he's 17 months old, eats anything (including plastic!) and he's hyperactive ADHD behaviour 21 hours every day....
 

4COR

Member
Joined
30 Jan 2019
Messages
682
Excellent parcels consist, @4COR 8-) I love the1950s to early 1960s when the rakes were of varying diagrams, origins and colours (notwithstanding the grot on top of green / crimson / maroon / brown!).
Yes - everything was effectively in BR s**t brown livery really, especially the SR vans... If they are anything like this Van B, then only one colour paint is needed... https://paulbartlett.zenfolio.com/srguvandb/hFD3AAAF#hfd3aaaf . Can even do without the numbering/transfers!

I may have to get some more Railmatch Frame Dirt at this rate...
My fish rake has gained 3 more pre-built ex-LNER vans. The other kits still require building, which has dropped in priority, below fostering the German Shepherd - he's 17 months old, eats anything (including plastic!) and he's hyperactive ADHD behaviour 21 hours every day....
Excellent news on the fish rake, not so good if the dog eats them! If nothing else, he'll calm down in about 3 years or so... :-/
 

Sun Chariot

Established Member
Joined
16 Mar 2009
Messages
3,699
Location
2 miles and 50 years away from the Longmoor Milita
Not one of my engines this, but a bit of work for my dad in fitting a Youchoos sound decoder, speaker and keepalive in one of his SR Q1s.
I have a soft spot for the Q1 and I have two of Hornby's - C1, C21 - black with Southern "sunshine" script, too.
I bought a second hand Hornby Merchant Navy tender with the same livery, purely to try a "never wassa" higher capacity tender on a Q1. I tell you what, the combination looks fab! 8-) It's boxed up in the loft at the mo.
 
Last edited:

4COR

Member
Joined
30 Jan 2019
Messages
682
Ever had one of those moments where you completely change your mind and do something a bit odd looking? I had this Mink G almost done, but then decided it needed to look a little older than it seemed, and needed some peeling paint. So, I painted a base layer in places of light grey to be weathered back, then it'll have the hairspray/chipping treatment to represent flaking paint. Hopefully it'll work out...

(Image of Mink G, big patches of grey paint...)

PXL_20250212_232436405.jpg

In other work, @xotGD I started a Palvan....

(image of body of Parkside Palvan kit)

PXL_20250212_232453497.jpg
 

4COR

Member
Joined
30 Jan 2019
Messages
682
Wonderful stuff, good sir! That's an effect I've wanted to try for years - but yet to successfully achieve - on my carriages' roofs; steel roofs of Mk1s particularly.
Martyn Welch's book touches on this - maskol over a base, spray over and rub it off. For the "bubbly" effect of timber covered with canvas, he recommends Day-Wat (which I think is/was a liquid poly?) to get the paint to "bubble" up.
 

Sun Chariot

Established Member
Joined
16 Mar 2009
Messages
3,699
Location
2 miles and 50 years away from the Longmoor Milita
Martyn Welch's book touches on this - maskol over a base, spray over and rub it off. For the "bubbly" effect of timber covered with canvas, he recommends Day-Wat (which I think is/was a liquid poly?) to get the paint to "bubble" up.
Thanks for that insight, G. I will give that a go, as it will bring my teak stock to "life". I've yet to see an elderly teak carriage with anything other than tired, bubbling canvas roofs. :)
 

4COR

Member
Joined
30 Jan 2019
Messages
682
Lots of dry brushing. Some of it looks vaguely OK - hopefully once it gets the hairspray/airbrush/peel treatment, the bits that show through will look OK ..

PXL_20250213_223958926.jpg


== Doublepost prevention - post automatically merged: ==

...and an evening distressing a Mink (G).... I oversprayed the grey wood base with hair spray, then bauxite, and once dry, loosened up the bauxite and started peeling a few bits off the planks here and there. Next will need to tidy up the bits I oversprayed, then weathering back in the whole lot to tone it back...

PXL_20250218_233508352.jpg PXL_20250218_233449587.jpg
 
Last edited:

4COR

Member
Joined
30 Jan 2019
Messages
682
Well, I think the thing about hair spray is that it prevents the acrylic sticking to the surface underneath, and it can be "activated" with water - so the thin acrylic film above can be persuaded to "peel" off. I have seen you need enamel underneath (which I used) but I suppose a decent matt varnish coat would do. Several videos around - Kathy Millat on YouTube has a good demo of a wooden building severely in need of a re-paint!
 

4COR

Member
Joined
30 Jan 2019
Messages
682
Think the Mink G is ready for a final dusting of dirt, and then the odd patch of oily residue adding now. Need to tone down the roof too...

PXL_20250227_221425521.jpg

The Palvan is pretty much done in terms of the mechanics - super fiddly handles to add on this - not helped by one breaking on the sprue... Painting up the normal weathering pattern along the irons, touching up paintwork and underneath, transfers and airbrush/powders to follow...

PXL_20250227_221104667.jpg
 

4COR

Member
Joined
30 Jan 2019
Messages
682
And the Mink G and Palvan are pretty much done (I need to add the coupling pockets onto the Palvan).

I may revisit the roofs at some point, but the Mink G is nicely aged dark and actually has (inadvertently) picked up a load of texture from the primer.

PXL_20250313_235652529.PORTRAIT.jpg
PXL_20250313_235718172.PORTRAIT.jpg
 

4COR

Member
Joined
30 Jan 2019
Messages
682
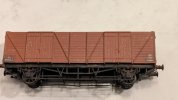
The next bauxite van done (bar the coupler). This is a PC26 Parkside kit - ex LNER corrugated end, vertical plank covered van (dia 102). Went together quite nicely really, even after dropping it after airbrushing and knocking the solebar off :s

Of note, I applied the transfers onto an airbrushed gloss cote patch and the carrier film is practically invisible. Matt Cote over afterwards to seal in and get rid of the gloss...

PXL_20250403_230445507~2.jpg
 

Sun Chariot

Established Member
Joined
16 Mar 2009
Messages
3,699
Location
2 miles and 50 years away from the Longmoor Milita
Of note, I applied the transfers onto an airbrushed gloss cote patch and the carrier film is practically invisible. Matt Cote over afterwards to seal in and get rid of the gloss...

View attachment 177791
Cracking job.
I have a couple of PC26 amongst my embarrassingly large "to do" pile.
The tip re: decals, I've read that elsewhere (aviation models) so thanks for sharing your success. I'll do similar on my kits
 

4COR

Member
Joined
30 Jan 2019
Messages
682
I also have another PC26 (and two PC25 (ex LNER fitted opens) from the looks - they share a chassis).

My "to do" pile appears to be getting larger and not smaller... at some point I will have a session on 16T minerals (I think I have seven of those to make up of various sorts...) trying to work my way through vans at present a bit! :|

The tip re: decals, I've read that elsewhere (aviation models) so thanks for sharing your success.

Yeah - I have got away with it a bit before, and Decalfix helps, but this is so much better. (Though, if you look very carefully you can just see the carrier in a very unforgiving photo = it's much less visible with the human eye, esp at a normal observing distance)
 
Last edited:

4COR

Member
Joined
30 Jan 2019
Messages
682
More covered wagons though slow progress with family, kids, cricket, Easter, work, etc...

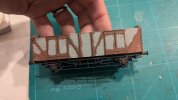
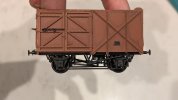
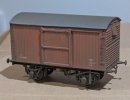
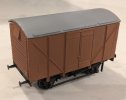
I have started an old (Kirk moulding) PC08 BR plywood side 12T van - it's almost ready for transfers/weathering once I spray off the transfer areas with gloss (and attach the coupling hooks). The roof was devoid of rainstrips so I added the 3 strip arrangement as shown with some plasticard. (Roof needs fettling and isn't yet attached!)

PXL_20250506_231958049.jpg

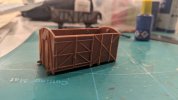
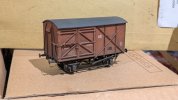
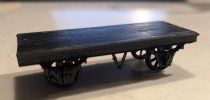
And, as per the acquisition thread, I have some Ratio 591 kits. The oldest is a Sturminster Newton era kit - it came with fairly horrific wheels moulded onto a sprue, so instead I've gone with a pair of 8 spokes with top hat bearings I had laying around.

This one I will do as one of the few surviving unfitted diagram 1455 vans (so grey paint, etc). V happy at how the (unconventional these days as it's two whole halves, floor and solebar etc) underframe has gone together and it's extremely free rolling.

PXL_20250506_231335127.jpg
 
Last edited:

Iskra

Established Member
Joined
11 Jun 2014
Messages
9,167
Location
West Riding
More covered wagons though slow progress with family, kids, cricket, Easter, work, etc...

I have started an old (Kirk moulding) PC08 BR plywood side 12T van - it's almost ready for transfers/weathering once I spray off the transfer areas with gloss (and attach the coupling hooks). The roof was devoid of rainstrips so I added the 3 strip arrangement as shown with some plasticard. (Roof needs fettling and isn't yet attached!)

View attachment 179521

And, as per the acquisition thread, I have some Ratio 591 kits. The oldest is a Sturminster Newton era kit - it came with fairly horrific wheels moulded onto a sprue, so instead I've gone with a pair of 8 spokes with top hat bearings I had laying around.

This one I will do as one of the few surviving unfitted diagram 1455 vans (so grey paint, etc). V happy at how the (unconventional these days as it's two whole halves, floor and solebar etc) underframe has gone together and it's extremely free rolling.

View attachment 179523
Nice work!

I have seen some simple plastic moulded wagon kits advertised recently that you just paint and then assemble. The cost saving wasn’t quite there for me to justify it, but I guess some people probably enjoy making the kits more than the finished model or you could paint them all slightly differently.
 

4COR

Member
Joined
30 Jan 2019
Messages
682
Nice work!

I have seen some simple plastic moulded wagon kits advertised recently that you just paint and then assemble. The cost saving wasn’t quite there for me to justify it, but I guess some people probably enjoy making the kits more than the finished model or you could paint them all slightly differently.
Thanks :) Yeah, I'm quite "careful" in my purchases - all the kits I've picked up so far have been eBay grabs mostly under £8 per kit, sometimes much less, and they vary somewhat in age (or indeed whether wheels are included), but each has been somewhat cheaper than the modern equivalent kits (and in a lot of cases, the RTR version just doesn't exist). And part of the fun is definitely in making them up. I have quite a backlog of kits to complete that I've slowly accumulated - mostly BR(s) CCTs, 16T minerals, 10/12/13T opens and 12T vans of all sorts... (Though I have a SR Borail and Bogie Bolster D which I'm looking forward to!)

But you're quite right, each one can be made individual (in terms of livery, numbering, weathering, underframes etc). As an example, I have three Ratio 591/5091 - The oldest here will be unfitted (Early BR Grey) and has 2 brake calipers with a double v hanger on the brake side and 8 spoke wheels. The other two have mouldings to let me make them as single v hangers, but vacuum braked with 4 calipers and tie bars and 3 hole disc wheels. Add in the Railtec ex-SR Box van transfers and you've got the ability to have quite some variation! There's a bit of care needed in construction (getting all 4 wheels on the floor mainly) but they are generally fairly simple.
 

4COR

Member
Joined
30 Jan 2019
Messages
682
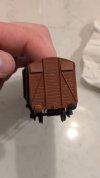
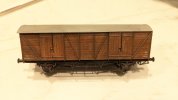
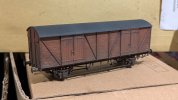
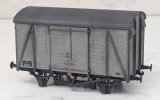
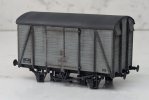
I've been chipping away at this unfitted, ex-SR diagram 1455 12 tonner. For the van nerds, note double V hangers both sides for the "freighter braked" version...

I can't quite decide if it's quite right, though it needs an airbrushing of frame dirt down below and a waft all over which might tie it together a bit....

PXL_20250530_122912503.PORTRAIT.ORIGINAL.jpg
PXL_20250530_122438424.jpg
 

Cowley

Forum Staff
Staff Member
Global Moderator
Joined
15 Apr 2016
Messages
17,315
Location
Devon
I've been chipping away at this unfitted, ex-SR diagram 1455 12 tonner. For the van nerds, note double V hangers both sides for the "freighter braked" version...

I can't quite decide if it's quite right, though it needs an airbrushing of frame dirt down below and a waft all over which might tie it together a bit....

View attachment 181011
View attachment 181009

Nicely done and the weathering washing down the sides really gives it some character and texture.
 

Sun Chariot

Established Member
Joined
16 Mar 2009
Messages
3,699
Location
2 miles and 50 years away from the Longmoor Milita
Last edited:

Sun Chariot

Established Member
Joined
16 Mar 2009
Messages
3,699
Location
2 miles and 50 years away from the Longmoor Milita
Last edited:

Top