• Our booking engine at tickets.railforums.co.uk (powered by TrainSplit) helps support the running of the forum with every ticket purchase! Find out more and ask any questions/give us feedback in this thread!

My 00 Gauge layout - Oldmoor Junction Model Railway

Status
Not open for further replies.

Peter C

Established Member
Joined
13 Oct 2018
Messages
4,519
Location
GWR land
I like building too…

Are you going to make a wider platform then Peter?
A cardboard template and a jigsaw (the type that cuts wood) could very well be your friend at this point, it’s not too difficult to do and you could make something that slots right into the gap.
Well that was the plan - I got working on it after making my post yesterday, and finished the first bit of work today. There are now platforms everywhere where there needs to be platforms!
photo3.jpeg

I found a texture for the paving slabs online and printed it out - it's a bit too blue to be an exact copy of Moor Street, but it's close enough. There are loads of bits which are in need of touching-up - mainly the platform edges, but also the bits where the new sections join up to the curved bits closer to the camera.
Hopefully this gives a better idea of what I meant with the water tower - it's still not perfect, but I'm hoping I'll be able to make some sort of water tower in a GWR style myself, so it can be a bit smaller than the Hornby one currently there.
At the ends of the new platforms, I've put some incredibly basic scratchbuilt signals - sort of taking an idea from our own Mr @Cowley with the two different static signals, one set to 'off' and the other 'on'. I'll replace these with proper kitbuilt ones at some point, when I've got a bit more work done.

I hadn't thought of making the platforms out of wood - we don't have a jigsaw and can't really afford one at the moment, so card it must be unfortunately. I prefer card, though; much easier to fix and much cheaper too :lol:

I like hard standing to the left by the Bubble Car by the way. :)
Thank you! It's incredibly simple - just some cereal packet card which is cut into the right-sized shapes once turned upside-down to hide the colourful outer bit and show the inner grey side. It's far easier than using some sort of filler between the tracks in my experience!

-Peter :)
 
Sponsor Post - registered members do not see these adverts; click here to register, or click here to log in
R

RailUK Forums

Cowley

Forum Staff
Staff Member
Global Moderator
Joined
15 Apr 2016
Messages
15,798
Location
Devon
That looks great, the curved platform looks the business.
How did you make that?
 

Peter C

Established Member
Joined
13 Oct 2018
Messages
4,519
Location
GWR land
That looks great, the curved platform looks the business.
How did you make that?
Thanks! :)
I did the curved platforms by putting some bits of paper on the board next to the curved track, then running a coach around the curve while holding a pencil to the middle of the coach so as to draw a line on the paper (if that makes any sense). I then took the paper and cut it to shape, making it straight on one side and curved on the other, before drawing the curve onto a piece of Metcalfe platform surface card, cutting that to shape, and making it as I've made all the other platforms, with the side walls and then lots of bits of card in the middle to strengthen it.

I hope that makes some sort of sense!

-Peter
 

Cowley

Forum Staff
Staff Member
Global Moderator
Joined
15 Apr 2016
Messages
15,798
Location
Devon
Thanks! :)
I did the curved platforms by putting some bits of paper on the board next to the curved track, then running a coach around the curve while holding a pencil to the middle of the coach so as to draw a line on the paper (if that makes any sense). I then took the paper and cut it to shape, making it straight on one side and curved on the other, before drawing the curve onto a piece of Metcalfe platform surface card, cutting that to shape, and making it as I've made all the other platforms, with the side walls and then lots of bits of card in the middle to strengthen it.

I hope that makes some sort of sense!

-Peter

Clever stuff!
 

Peter C

Established Member
Joined
13 Oct 2018
Messages
4,519
Location
GWR land
Clever stuff!
Why thank you - I have been known to have the occasional clever idea... ;)

Hi peter. I never think of resin buildings. I've only think of card or plastic kit's. The way you have done the curved platform is the old school way. With the pencil on the rear end of a coach. Alf
Ah that's fair enough - a lot of (see; "pretty much all") resin buildings are quite expensive for what you get. I think I was given most of the resin buildings on the layout before I found out about card kits, which has made completing the rest of the buildings in the town scene so much cheaper!
I think I got the idea for the platform from the Budget Model Railways YouTube channel - some super tips on there.

-Peter :)

============

For all those wishing to build a scale model of a GWR water tower, as features on the platform at Birmingham Moor Street, take my advice; don't. Save the time and effort and buy a pre-made one from Hornby or somewhere. It's easier, quicker, and it won't be your fault when it's broken in transit.

(This message brought to you by the Modellers Of Railway Orders Network)

-
Peter ;)
 
Last edited:

Cowley

Forum Staff
Staff Member
Global Moderator
Joined
15 Apr 2016
Messages
15,798
Location
Devon
Hmm. I think you should make it properly and fill it with real water…
 

Peter C

Established Member
Joined
13 Oct 2018
Messages
4,519
Location
GWR land
Hmm. I think you should make it properly and fill it with real water…
Don't give me ideas - before you know it, I'll have done that, and rigged it up the water cranes on the platform ends and all sorts... ;)

-Peter
 

Cowley

Forum Staff
Staff Member
Global Moderator
Joined
15 Apr 2016
Messages
15,798
Location
Devon
Don't give me ideas - before you know it, I'll have done that, and rigged it up the water cranes on the platform ends and all sorts... ;)

-Peter

I know water and electricity doesn’t mix very well but I once saw a model of a Welsh narrow gauge railway where the guy who’d built it had grown moss to simulate moorland. It looked really good!
The best bit was that he had a teeny watering can to sprinkle it with in between trains going past…
 

Peter C

Established Member
Joined
13 Oct 2018
Messages
4,519
Location
GWR land
I know water and electricity doesn’t mix very well but I once saw a model of a Welsh narrow gauge railway where the guy who’d built it had grown moss to simulate moorland. It looked really good!
The best bit was that he had a teeny watering can to sprinkle it with in between trains going past…
That sounds brilliant! I'm now wondering if, had the engines been live-steam, the water blown out from the cylinders could have watered the moss... :lol:

-Peter
 

Peter C

Established Member
Joined
13 Oct 2018
Messages
4,519
Location
GWR land
Well, it's been a couple of weeks since my last post, and in that time not an awful lot has happened on the railway, I must admit, although there have been a few new arrivals!

I'm quite a fan of the older Triang models - mostly because they're cheaper than new models and there are a few classes of engine you can't get in new toolings. This pair doesn't fit that last point, but they definitely fit into the "value for money" category, I think.
View attachment 20220313_144401.jpg
I bought these a week or so ago. They're a pair of Triang Jintys (Jinties?), and only cost £13 each from eBay. They came as a pair, and both run - though not amazingly, but I think that's down to them being fairly mucky on the inside. You can also see that the one closest to the camera has had a bit of a shunt at some point - a plan I had was to try and fix that perhaps with some plasticard. They're both missing the screws holding the body onto the chassis, and the one furthest from the camera is missing a front coupling, but for £13 each I couldn't say no, especially considering a lot of people are trying to get ~£20 for these. They'll work nicely as either just general-purpose engines, or small shunters, which I really could do with at the moment given most of the fleet is formed of larger engines!
These will need a proper clean (both internally and externally) before they run properly on the layout, but that'll be a project for the coming weeks.

Another new arrival is this - it was supposed to be a Christmas present but I think it turned out it was on pre-order :lol:
20220313_144545.jpg
(It's the van, not the pillar box)
Funny timing given our Mr @Cowley has been sharing his new mail vans - although this is a slightly different form of postal transport ;)
This is a lovely little Oxford Diecast model, and works really well in the town scene with the pillar box: I might see if I can get a little postie to go with it. Vehicles on a modern-image layout do a lot to make it actually look modern-image - and while I'm not saying Oldmoor is by any means a perfect representation of the modern railway scene, it's definitely not a model of railways past. I'm looking into getting a few more modern vehicles and then perhaps swapping them out with the older stuff when I want to run a different era; though that might be a bit more effort than it's worth!


That's all the new arrivals on the layout from the past couple of weeks - now onto some more general bits-and-bobs. It's like the evening news with this sort of structure!
20220313_144452.jpg
This is just a photo of Oldmoor Junction that I took when I was kneeling down to get the photo of the two Jintys above. I quite like this end-of-the-line terminus view; I might see if I can incorporate plenty of windows into the station building (if I ever get it built!). You can also see a bit of the new water tower in this shot - it's just behind the old Hornby one, on the right of the frame.

20220313_145111.jpg
And here is that water tower! It's definitely a bodge at the moment, but you can hopefully see where I'm going with it. It's not been properly stuck together, and I'm still trying to work out ways of just finishing the base off before I work on the water tank at the top, but it adds a bit to this section of the platform. There's not a lot of space down either side of the water tower on the platform to allow passengers to pass, but I don't really want to move it any further back down the platform as then it'll be a bit too close to the main station building.
(We'll also ignore the fact that someone seems to have fallen over on the other platform...)

20220313_145123.jpg
Here's a shot of the end of the water tower platform, showing the mess which is some ballast, the fact I need to sort out a join in the platform, and the very basic signals I made. The signals are made from just some cotton buds for the posts, and paper for the signal arms which I've drawn myself. They're just placeholders really, until I can get some Ratio kits for some proper GWR-style ones. The one at the end of the platform is taller than the other two, with two co-acting arms; my thinking was you'd probably want the driver of a non-stop service to be able to see the position of the signal before they reached it at the end of the platform!

20220313_145128.jpg
This is a relatively boring photo, but it's just to illustrate a bit of a problem I've got at the moment with the two buildings to the right of the frame - the insurances offices and the pine shop. Neither of them work with the countryside village theme I've tried to make for the other road going through the town, and having them close to the roundabout spoils the scene with the coaching inn. I'd quite like to put a park, or at least green space, in the currently-empty area by the railway, for two reasons: the first, being that it's relatively easy to cover an area in static grass and then for it to look like something's been done; the second, being that I'm moving more towards the idea of the whole town being more of a countryside-type thing than having the two distinct urban and rural roads. It won't be perfect, but so much of the layout is a bit of a bodge because of the space and I'm not overly fussed about that really.
The only solution I can think of at the moment is that the two big buildings are taken off the layout, and then I either use the space they leave as space for the green area, something railway-related, or put a couple of smaller buildings in their place. The insurances offices building has been a bit big for the layout for some time now, and it doesn't really go with the 'vibe' of the rest of the scene. Plus, Oldmoor is definitely an idealised version of reality - hence the countryside road which looks like it's inspired by a jigsaw puzzle and the railway station 'restored' to the railways' golden era of the 1920s/30s. These two big shops don't really fit my idea of an ideal place I'd like to visit - I don't think many people particularly enjoy visiting a big industrial estate or retail park, and I'm no exception :lol:

Apologies for the rambling - but hopefully that gives you a bit of an idea of what I've been up to (or rather, not been up to) for the past couple of weeks. I'm hoping to get some more work done on the layout in the coming weeks: ideally most of the bits of the layout which require leaning over the board will be sorted come the warmer months, because ain't half a pain leaning over all those buildings anyway, let alone when you're as hot as the inside of a locomotive firebox!

Thanks for reading :)

-Peter
 

Attachments

  • 20220313_144401.jpg
    4.6 MB · Views: 6

Cowley

Forum Staff
Staff Member
Global Moderator
Joined
15 Apr 2016
Messages
15,798
Location
Devon
Well, it's been a couple of weeks since my last post, and in that time not an awful lot has happened on the railway, I must admit, although there have been a few new arrivals!

I'm quite a fan of the older Triang models - mostly because they're cheaper than new models and there are a few classes of engine you can't get in new toolings. This pair doesn't fit that last point, but they definitely fit into the "value for money" category, I think.
View attachment 111391
I bought these a week or so ago. They're a pair of Triang Jintys (Jinties?), and only cost £13 each from eBay. They came as a pair, and both run - though not amazingly, but I think that's down to them being fairly mucky on the inside. You can also see that the one closest to the camera has had a bit of a shunt at some point - a plan I had was to try and fix that perhaps with some plasticard. They're both missing the screws holding the body onto the chassis, and the one furthest from the camera is missing a front coupling, but for £13 each I couldn't say no, especially considering a lot of people are trying to get ~£20 for these. They'll work nicely as either just general-purpose engines, or small shunters, which I really could do with at the moment given most of the fleet is formed of larger engines!
These will need a proper clean (both internally and externally) before they run properly on the layout, but that'll be a project for the coming weeks.
Well I really like those old Jinty’s because I had at least one when I was a wee lad. The nice thing about them is that you can detail them and repair them and it’s not a worry because they didn’t cost too much.
By the way, if you want to send them with the other loco I’m sure I could get them running smoothly.
Another new arrival is this - it was supposed to be a Christmas present but I think it turned out it was on pre-order :lol:
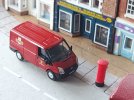
View attachment 111386
(It's the van, not the pillar box)
Funny timing given our Mr @Cowley has been sharing his new mail vans - although this is a slightly different form of postal transport ;)
This is a lovely little Oxford Diecast model, and works really well in the town scene with the pillar box: I might see if I can get a little postie to go with it. Vehicles on a modern-image layout do a lot to make it actually look modern-image - and while I'm not saying Oldmoor is by any means a perfect representation of the modern railway scene, it's definitely not a model of railways past. I'm looking into getting a few more modern vehicles and then perhaps swapping them out with the older stuff when I want to run a different era; though that might be a bit more effort than it's worth!
That van looks excellent, I think running different eras is good fun anyway.
That's all the new arrivals on the layout from the past couple of weeks - now onto some more general bits-and-bobs. It's like the evening news with this sort of structure!
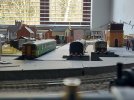
View attachment 111387
This is just a photo of Oldmoor Junction that I took when I was kneeling down to get the photo of the two Jintys above. I quite like this end-of-the-line terminus view; I might see if I can incorporate plenty of windows into the station building (if I ever get it built!). You can also see a bit of the new water tower in this shot - it's just behind the old Hornby one, on the right of the frame.
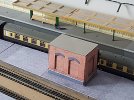
View attachment 111388
And here is that water tower! It's definitely a bodge at the moment, but you can hopefully see where I'm going with it. It's not been properly stuck together, and I'm still trying to work out ways of just finishing the base off before I work on the water tank at the top, but it adds a bit to this section of the platform. There's not a lot of space down either side of the water tower on the platform to allow passengers to pass, but I don't really want to move it any further back down the platform as then it'll be a bit too close to the main station building.
It’s nice to see you having a go at building things from scratch. The more you do the better you’ll get at it and in the long run it not only saves money but everything you make is individual to your railway.
*Anyway I’ve had a thought that might be helpful but I’ll add it after I’ve finished replying.
(We'll also ignore the fact that someone seems to have fallen over on the other platform...)
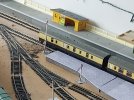
View attachment 111389
Here's a shot of the end of the water tower platform, showing the mess which is some ballast, the fact I need to sort out a join in the platform, and the very basic signals I made. The signals are made from just some cotton buds for the posts, and paper for the signal arms which I've drawn myself. They're just placeholders really, until I can get some Ratio kits for some proper GWR-style ones. The one at the end of the platform is taller than the other two, with two co-acting arms; my thinking was you'd probably want the driver of a non-stop service to be able to see the position of the signal before they reached it at the end of the platform!
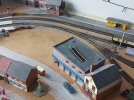
View attachment 111390
This is a relatively boring photo, but it's just to illustrate a bit of a problem I've got at the moment with the two buildings to the right of the frame - the insurances offices and the pine shop. Neither of them work with the countryside village theme I've tried to make for the other road going through the town, and having them close to the roundabout spoils the scene with the coaching inn. I'd quite like to put a park, or at least green space, in the currently-empty area by the railway, for two reasons: the first, being that it's relatively easy to cover an area in static grass and then for it to look like something's been done; the second, being that I'm moving more towards the idea of the whole town being more of a countryside-type thing than having the two distinct urban and rural roads. It won't be perfect, but so much of the layout is a bit of a bodge because of the space and I'm not overly fussed about that really.
The only solution I can think of at the moment is that the two big buildings are taken off the layout, and then I either use the space they leave as space for the green area, something railway-related, or put a couple of smaller buildings in their place. The insurances offices building has been a bit big for the layout for some time now, and it doesn't really go with the 'vibe' of the rest of the scene. Plus, Oldmoor is definitely an idealised version of reality - hence the countryside road which looks like it's inspired by a jigsaw puzzle and the railway station 'restored' to the railways' golden era of the 1920s/30s. These two big shops don't really fit my idea of an ideal place I'd like to visit - I don't think many people particularly enjoy visiting a big industrial estate or retail park, and I'm no exception :lol:
I think you’re probably right about putting a green space in there and getting rid of the office block.
Would it be worth building the ground up a bit so that it isn’t dead flat?
I suppose another option is to do it as fenced off waste land? Maybe that’s not very villagey though.
Apologies for the rambling - but hopefully that gives you a bit of an idea of what I've been up to (or rather, not been up to) for the past couple of weeks. I'm hoping to get some more work done on the layout in the coming weeks: ideally most of the bits of the layout which require leaning over the board will be sorted come the warmer months, because ain't half a pain leaning over all those buildings anyway, let alone when you're as hot as the inside of a locomotive firebox!

Thanks for reading :)

-Peter
*Yes I was going to say that on the corners of the water tower if you wanted to hide the joins, a really easy way of doing it to put drainpipes down it. What I use is the stuff from garden centres that people use to tie plants back. It comes with a green plastic coating and it’s cheap and easy to shape.

Both of these are where they are to hide joins that I wasn’t happy with:

C8F66A9E-E1FD-48B6-B354-F816ADC78C0B.jpeg

4EBCB45A-DC07-416B-8294-11B1CB215A80.jpeg
 

Peter C

Established Member
Joined
13 Oct 2018
Messages
4,519
Location
GWR land
Well I really like those old Jinty’s because I had at least one when I was a wee lad. The nice thing about them is that you can detail them and repair them and it’s not a worry because they didn’t cost too much.
By the way, if you want to send them with the other loco I’m sure I could get them running smoothly.
They do look to be lovely little engines. I notice the numbers on the front numberplate are actually moulded on, so I could take to them with a white paint pen and make them stand out.
That's very kind of you - thanks! I need to get all that sorted actually. Sorry it's taken so long!

That van looks excellent, I think running different eras is good fun anyway.
I think Oldmoor could be used as a sort of time capsule; there's so much going on from all different eras, it's difficult to keep up!

It’s nice to see you having a go at building things from scratch. The more you do the better you’ll get at it and in the long run it not only saves money but everything you make is individual to your railway.
*Anyway I’ve had a thought that might be helpful but I’ll add it after I’ve finished replying.
Thanks! Money is definitely one of the main reasons for making some of the bits myself. Yes they're not perfect, but I'm not modelling to the standards of Pendon or some of the layouts on here. At the end of the day, it's still based around the dimensions of a train set!

I think you’re probably right about putting a green space in there and getting rid of the office block.
Would it be worth building the ground up a bit so that it isn’t dead flat?
I suppose another option is to do it as fenced off waste land? Maybe that’s not very villagey though.
I hadn't thought of building the ground up - I might do that in one of the corners (I know that sounds a bit odd for an area which has a big curved edge), or perhaps along part of one of the edges. I'm sort of trying to base it on Spiceball Park in Banbury, which is sort-of near the station (definitely somewhat close to the railway). It's quite a large area, but there's one bit in particular which I quite like. It's nothing much, just a green open space really - but it's quite a nice place. There doesn't seem to be much in the way of photos online of the area I'm on about: this gives a fairly good indication though:
1647199235146.png
(not my photo: from https://www.trfihi-parks.com/en/park-details/16919-Spiceball-Country-Park)

I've got a couple of small areas on the layout, around the railway centre, where a waste area wouldn't go amiss actually. There's a bit by the goods shed which could be just right for some old bits of engines that sort of thing.

*Yes I was going to say that on the corners of the water tower if you wanted to hide the joins, a really easy way of doing it to put drainpipes down it. What I use is the stuff from garden centres that people use to tie plants back. It comes with a green plastic coating and it’s cheap and easy to shape.

Both of these are where they are to hide joins that I wasn’t happy with:

View attachment 111395

View attachment 111396
Ah now that's quite a clever technique - thank you! I've seen people do guttering with black card before but never with that sort of plastic stuff. I might see if we've any of it around the house (else black card might work, but it'd take a bit of persuading). Looks like the sort of thing you could paint to be different colours too, which would be ideal to keep in with the GWR style.

-Peter :)
 

Peter C

Established Member
Joined
13 Oct 2018
Messages
4,519
Location
GWR land
Well then - it's been a week since the last update, and I've got a bit of work done. Exciting, I know! :lol:
I've spent the weekend getting a couple of things done on the layout - mostly, a new bit. I had the idea earlier this week and thought about it properly yesterday, then today was spent making it into some form of reality. How the Ancient Greeks did all their thinking, I'll never know - I've tried it for one weekend and it ain't half worn me out...

Here's the area in question:
20220320_171733.jpg
And I challenge you to work out what on earth it is... ;)
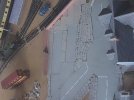
Spoilers - it's a bus station (well, the beginnings of one, anyway). I know it really looks quite a mess now, but there's method to my madness, promise!
This is a very basic two-road bus station, in the very early stages of construction. There are two 'bays' for buses to sit in, each with a walkway so passengers can board/alight the buses, and there's a 'concourse' area at the end of the bays so passengers can actually enter/exit the bus station itself. The buses would drive straight into the bays and then have to reverse out, as they do in Banbury bus station, hence why there are two walkways, provided on the left-hand side of the bays as the buses would look to the right of the frame.
There's a very basic wall around the outside of the station at the moment: the plan is to get some sort of canopy to put over the concourse and part of the furthest-away walkway, and some fences to go round various bits of the station as a whole. I also need to get a small amount of filler or something to fill the gaps between the homemade paving slabs on the wide pavement outside the bus station! I must say, I quite like having the wider pavement; it adds to the area I think, given this bit of the layout is more based on a particular bit of Banbury than anywhere else.

Talking of pavements, I got the curved pavement done on the village-themed street:
20220320_195714.jpg
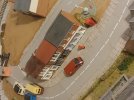
It's far from perfect, but it's something. I'll need to fill in some of the gaps between the paving slabs, and something needs doing about the shop doorways, but for now it's alright. The idea for having the pavement this shape was to allow for the three shops to sit alongside each other without having big gaps between them, but to keep the curve in the road, which wasn't exactly changeable at this point. I got the curve right by putting a bit of paper over the existing pavement and drawing along the inside edge with a pencil to get a vaguely-correct marking, then I took that, cut it out, and started sticking some homemade paving slabs to it (these paving slabs being made just from off-cuts from Metcalfe kits).
I've sort put an end on this pavement with the telephone box and the wall surrounding it: that was a sort-of accident but it looks quite nice I think. I need to sort out the war memorial; I think it'll probably be some sort of small garden.

So there we go - a couple of jobs done. Now the next project is going to be making the park area in the empty space at the top of that last photo - hopefully I'll have enough static grass to do it all. I'm going to get some more fencing and hedges before I start work on that, though, just so I can better-plan the space I'll have available, and so they act as a barrier for the static grass when applying it - so much easier than holding up bits of paper or taping them to the track!

Thanks for reading. :)

-Peter
 

Cowley

Forum Staff
Staff Member
Global Moderator
Joined
15 Apr 2016
Messages
15,798
Location
Devon
Well then - it's been a week since the last update, and I've got a bit of work done. Exciting, I know! :lol:
I've spent the weekend getting a couple of things done on the layout - mostly, a new bit. I had the idea earlier this week and thought about it properly yesterday, then today was spent making it into some form of reality. How the Ancient Greeks did all their thinking, I'll never know - I've tried it for one weekend and it ain't half worn me out...

Here's the area in question:
View attachment 111776
And I challenge you to work out what on earth it is... ;)
Spoilers - it's a bus station (well, the beginnings of one, anyway). I know it really looks quite a mess now, but there's method to my madness, promise!
This is a very basic two-road bus station, in the very early stages of construction. There are two 'bays' for buses to sit in, each with a walkway so passengers can board/alight the buses, and there's a 'concourse' area at the end of the bays so passengers can actually enter/exit the bus station itself. The buses would drive straight into the bays and then have to reverse out, as they do in Banbury bus station, hence why there are two walkways, provided on the left-hand side of the bays as the buses would look to the right of the frame.
There's a very basic wall around the outside of the station at the moment: the plan is to get some sort of canopy to put over the concourse and part of the furthest-away walkway, and some fences to go round various bits of the station as a whole. I also need to get a small amount of filler or something to fill the gaps between the homemade paving slabs on the wide pavement outside the bus station! I must say, I quite like having the wider pavement; it adds to the area I think, given this bit of the layout is more based on a particular bit of Banbury than anywhere else.

Talking of pavements, I got the curved pavement done on the village-themed street:
View attachment 111778
It's far from perfect, but it's something. I'll need to fill in some of the gaps between the paving slabs, and something needs doing about the shop doorways, but for now it's alright. The idea for having the pavement this shape was to allow for the three shops to sit alongside each other without having big gaps between them, but to keep the curve in the road, which wasn't exactly changeable at this point. I got the curve right by putting a bit of paper over the existing pavement and drawing along the inside edge with a pencil to get a vaguely-correct marking, then I took that, cut it out, and started sticking some homemade paving slabs to it (these paving slabs being made just from off-cuts from Metcalfe kits).
I've sort put an end on this pavement with the telephone box and the wall surrounding it: that was a sort-of accident but it looks quite nice I think. I need to sort out the war memorial; I think it'll probably be some sort of small garden.

So there we go - a couple of jobs done. Now the next project is going to be making the park area in the empty space at the top of that last photo - hopefully I'll have enough static grass to do it all. I'm going to get some more fencing and hedges before I start work on that, though, just so I can better-plan the space I'll have available, and so they act as a barrier for the static grass when applying it - so much easier than holding up bits of paper or taping them to the track!

Thanks for reading. :)

-Peter

Nice and I like the bus station idea, we had one on the upper layer of my sons railway and it definitely added a different dimension. It’s on the right in this picture. Not quite the same as your idea but similar.

4B5D36A6-BDAD-4348-9960-4B0DB7CD5620.jpeg

Those roads and pavements have come out really well Peter.
 

Peter C

Established Member
Joined
13 Oct 2018
Messages
4,519
Location
GWR land
Nice and I like the bus station idea, we had one on the upper layer of my sons railway and it definitely added a different dimension. It’s on the right in this picture. Not quite the same as your idea but similar.

View attachment 111798

Those roads and pavements have come out really well Peter.
Sorry it's taken so long to respond - I thought I'd replied but turns out, well, I hadn't. Problem that.
Why thank you :)
That looks really good - liking the variety of vehicles (and actually the detailing on the ground by the tracks and up the walls).


Now there's not been an awful lot of work going on with the layout this past week. I'd like to give a reason but it's mostly because other things have just got in the way. But now, for reasons I shall leave unnamed, I can't go out-and-about for at least five days, so perhaps this is the time to get a few bits done. I've got a basket on eBay filled with a few scenic items, and I've got my eye on an engine from somewhere else, so hopefully some much-needed retail therapy (though I think my wallet may wish to disagree there) is on its way - as soon as I've ordered it all, that is.

Whilst I'm here actually - you're a clever bunch: I'm looking into getting a bus for the layout (this is all pie-in-the-sky at the moment, until I can find one for a good price), but none of the ones I can find are what I'm looking for - they've all got some sort of branding on them which I wouldn't want. Is it a fairly straightforward process to remove the branding, whilst keeping the livery underneath intact - even if some of the branding is on the windows? And another thing - how easy would it be to change the destinations? I assume that varies from model to model - the one I'm looking into getting is a Creative Master Northcord Ltd. Enviro 200.

Thanks!

-Peter :)
 

Iskra

Established Member
Joined
11 Jun 2014
Messages
7,975
Location
West Riding
Unlucky Peter, if it is what I think it is. Hopefully you can use the time to make some progress! :)
 

Peter C

Established Member
Joined
13 Oct 2018
Messages
4,519
Location
GWR land
Unlucky Peter, if it is what I think it is. Hopefully you can use the time to make some progress! :)
Hopefully - I've just ordered this new engine so hopefully that should arrive before the end of my time hidden away from the outside world. It's a pre-owned one, but I think it's going to turn out to be an absolute bargain - especially with the finishing touch I've got to go with it. In true @reddragon style, you'll all have to wait and see to find out what it is ;)

-Peter
 

Iskra

Established Member
Joined
11 Jun 2014
Messages
7,975
Location
West Riding
Hopefully - I've just ordered this new engine so hopefully that should arrive before the end of my time hidden away from the outside world. It's a pre-owned one, but I think it's going to turn out to be an absolute bargain - especially with the finishing touch I've got to go with it. In true @reddragon style, you'll all have to wait and see to find out what it is ;)

-Peter
Haha, I’m looking forward to seeing what it is!
 

Cowley

Forum Staff
Staff Member
Global Moderator
Joined
15 Apr 2016
Messages
15,798
Location
Devon
Five days in waiting for a delivery for Mrs Miggins maybe..?

Hm. Not sure about the bus. Could you put a link to one of the ones you’re thinking about?
 

Peter C

Established Member
Joined
13 Oct 2018
Messages
4,519
Location
GWR land
Five days in waiting for a delivery for Mrs Miggins maybe..?
That was it - couldn't quite remember. Thank you :lol:
Though I wouldn't hold out much hope of any of her deliveries arriving within five days - five months is pushing it...

Hm. Not sure about the bus. Could you put a link to one of the ones you’re thinking about?
Here we go:
1648227853929.png
I'd want to remove all the "6/jazz" branding on it, essentially leaving it as a plain Stagecoach bus.
Photo from Hattons

-Peter
 

Cowley

Forum Staff
Staff Member
Global Moderator
Joined
15 Apr 2016
Messages
15,798
Location
Devon
That was it - couldn't quite remember. Thank you :lol:
Though I wouldn't hold out much hope of any of her deliveries arriving within five days - five months is pushing it...


Here we go:
View attachment 112039
I'd want to remove all the "6/jazz" branding on it, essentially leaving it as a plain Stagecoach bus.
Photo from Hattons

-Peter

God that’s really cool!
No idea to be honest but I’ll look into it…
 

Peter C

Established Member
Joined
13 Oct 2018
Messages
4,519
Location
GWR land
God that’s really cool!
No idea to be honest but I’ll look into it…
I know next to nothing about buses, but I've travelled on that type a fair bit and looking at the photos I can find online, it looks to be a really good representation of them. It'd be lovely to have one on Oldmoor! :D
I'm wondering if it's a similar thing to removing numbers etc. on locomotives/coaches? I can't remember what you'd use for that though. T-Cut? Or is that too strong?

-Peter

==== new post made 29.3.2022, 17.42 ====

So - the new engine arrived today! I can imagine you're all dying to know what it is...

Image 4.5.jpg
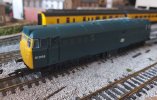
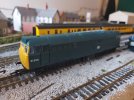
It's this lovely Class 31 from Hornby. It's a RailRoad model from a few years ago, but the tooling goes back further than that. It doesn't have lights, but it runs really well - and I've got a sound chip to go with it! The decoder is currently in the Class 50 (as it has been for some years) but now I've got an engine to go with it properly.


However - less than ten minutes after setting the engine on its running-in period, we had a bit of an issue...
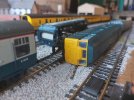
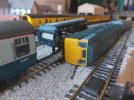
Image 1.jpeg
Now I've spoken to a few people and apparently trains shouldn't be at that angle. I've also gone full RAIB and tried to work out what happened (given it happened after I left the room, because of course it did)...

Image 6.jpeg
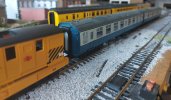
Here's the formation of the train: 31256 + Mk1 SO + Mk1 Buffet Restaurant + Mk1 SO. It was running on the 'Up' line (the outer loop) at a moderate speed.

Image 1.jpeg
And here's the scene after the incident again. What seems to have happened is the coupling between the first and second coaches has, well, stopped doing its job (to be fair there was only the one hook instead of two), the train has run around the layout, and then the engine has collided with the rear coach (laying on the 'Down' line next to the engine), fallen over onto the ballast between the Up line and the Little Piddling branch, taking its one coach with it.

This is the point where I sort of went a bit barmy (as if that hadn't happened before) and set up a whole scene...

Image 2.jpeg
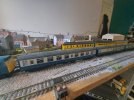
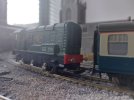
The buffet restaurant coach remained on the rails, so it was taken away by the resident Oldmoor Class 09. It was taken to Oldmoor Junction, where it was stabled in the non-platform road - it'll sit there until the end of play today, when it can be marshalled into a train full of the stock from this train (and the rescue) to be taken to Old Oak Common.

Image 3.jpeg
The Class 09 then got the local breakdown crane (Oldmoor's fairly lucky in having a crane stabled here, though actually with the number of derailments and accidents which happen here it's less luck and more necessity) to right the remaining stock.

Image 4.jpeg
The engine was picked up first, so that it could then be moved to allow the crane to get the coach which was behind it in this shot. The engine has also been taken to Oldmoor Junction station as the T&RSMD is currently full. It'll be moved into the shed at the depot this evening to have a check and make sure it's alright to be put into service tomorrow.

Image 5.jpeg
The last two coaches were then put back on the rails and moved to Oldmoor Junction, so they can be put in the same train as the first coach. The breakdown crane will also be put on that train but won't go through to Old Oak Common - it's stored just outside Oldmoor so it's easier to move it as part of that train.


Anyway - that made me giggle a bit. Needless to say, no 1:76 people were injured (mainly because there weren't any on the train - not even in the driver's cab). Actually on the subject of the driver's cab, the windows of one cab, and down one side of the engine, are frosted; the engine was listed as this but for the super deal of £35, I went for it and I think I can probably just change the glazing if I need to. If @Cowley can run frosted-glass engines, I think the slightly less-detailed Oldmoor can use it too :lol:

Thanks for reading all that - I know it was quite the ramble.

-Peter :)
 
Last edited:

reddragon

Established Member
Joined
24 Mar 2016
Messages
3,147
Location
Churn (closed)
Peter, you have been reading too much Thomas the Tank Engine!

They had an inordinate number of 'incident' on the Ilse of Sodor!
 

Cowley

Forum Staff
Staff Member
Global Moderator
Joined
15 Apr 2016
Messages
15,798
Location
Devon
I had a worse incident than this once. I’m sure I’ve said it before but it’s worth repeating again.

Seven (ish) coach train of expensive Hornby Pullmans pulled by expensive Hornby 50007 Sir Edward Elgar.
Rear four carriages become uncoupled on the viaduct over the loft hatch in my old house. 50007 trundles right around the layout without me noticing before crashing into the rest of the train and most of it including the loco disappearing down the loft hatch with predictable results.

Ouch.

Like the 31 Peter!
 

Peter C

Established Member
Joined
13 Oct 2018
Messages
4,519
Location
GWR land
Peter, you have been reading too much Thomas the Tank Engine!

They had an inordinate number of 'incident' on the Ilse of Sodor!
That little engine had a massive influence on me liking railways - even though he is a little conceited and egotistical, got to thank him for something, I suppose ;)

I had a worse incident than this once. I’m sure I’ve said it before but it’s worth repeating again.

Seven (ish) coach train of expensive Hornby Pullmans pulled by expensive Hornby 50007 Sir Edward Elgar.
Rear four carriages become uncoupled on the viaduct over the loft hatch in my old house. 50007 trundles right around the layout without me noticing before crashing into the rest of the train and most of it including the loco disappearing down the loft hatch with predictable results.

Ouch.

Like the 31 Peter!
Oh blimey - that's painful to even think about! I would ask how bad the damage was but I suspect it took a long search to find all the pieces!
Perhaps there's a market in there somewhere - vacuum braking for model railway trains. You lose the vacuum, train stops. Only issue is fitting it into an engine and coaches that small - especially in N gauge... :lol:
Why thank you - it's a good little model for what it is, and what it cost. It's really quite a smooth runner (when it's not sliding along the ballast).

-Peter
 

reddragon

Established Member
Joined
24 Mar 2016
Messages
3,147
Location
Churn (closed)
I had a worse incident than this once. I’m sure I’ve said it before but it’s worth repeating again.

Seven (ish) coach train of expensive Hornby Pullmans pulled by expensive Hornby 50007 Sir Edward Elgar.
Rear four carriages become uncoupled on the viaduct over the loft hatch in my old house. 50007 trundles right around the layout without me noticing before crashing into the rest of the train and most of it including the loco disappearing down the loft hatch with predictable results.

Ouch.

Like the 31 Peter!
I have solid fencing on bends & over the loft hatch just to prevent that happening!
 

Cowley

Forum Staff
Staff Member
Global Moderator
Joined
15 Apr 2016
Messages
15,798
Location
Devon
Well chaps, I certainly put some proper fencing in after that incident!

Peter - Sir Edward was taken by ambulance (my van) to the model shop in Exeter the day after and Dave just said “What have you done to it!?”

He had a go at fixing it but it was never right again. I ended up stripping it out and using it as a dummy for double headers with my other 50.
The carriages that were damaged the worst were relegated to my sons railway and he loved them even though they were all glued back together! :lol:
 

Peter C

Established Member
Joined
13 Oct 2018
Messages
4,519
Location
GWR land
Well chaps, I certainly put some proper fencing in after that incident!

Peter - Sir Edward was taken by ambulance (my van) to the model shop in Exeter the day after and Dave just said “What have you done to it!?”

He had a go at fixing it but it was never right again. I ended up stripping it out and using it as a dummy for double headers with my other 50.
The carriages that were damaged the worst were relegated to my sons railway and he loved them even though they were all glued back together! :lol:
Oh dear :lol:
That's good though, that you managed to use it as a dummy. Quite a good use for a slightly "used" engine, shall we say!
Love that with the coaches - not everything has to be super-detailed to work. Sometimes 'good enough' is just good enough!

-Peter
 

Peter C

Established Member
Joined
13 Oct 2018
Messages
4,519
Location
GWR land
I need to get better at putting updates on here... :lol:
This week has taught me a lesson you'd have thought I'd have picked up several years ago - running your trains means they keep working. I can tell you're all dying to know what happens next, so I best get on with it (and I shall have to try not to tell you the funny anecdote I heard yesterday which involved Mrs Miggins, a sponge finger, and a pinecone)...

This week, in Oldmoor terms, has been focused on just running trains. I seem to go in spurts of either scenery or operating when it comes to the layout (though actually, I overcomplicate so much of the scenic work it does feel like an operation by itself), and this past month has been no different. My static grass supply has run out (which, to be fair, isn't all that bad considering I bought the one small bottle a few years ago now when I was first starting out doing scenic work on a much earlier version of the layout), and so I can't work on the park area until I get some more. There's also non-railway things which need saving-up for and the like, so running trains is as good as it'll get for a while (but that's not all that bad, surely ;))!

This all started out last week, in fact - I decided to get working through the fleet of operational locomotives (now isn't that a fancy term) on Oldmoor to make sure they all still worked, and to try and coax some life into them if they didn't. I wasn't going to go full engine restoration here, but I was going to try and do some very basic maintenance. Essentially the model railway equivalent of kicking the tyres and saying "yeah, that'll work".

I started with the DC stuff and moved onto DCC earlier this week (I've been very slow with it all). I also gave the track, in the words of Basil Fawlty, a damn good thrashing with the track rubber - turns out trains work so much better if you run them on clean track. Who knew? Well I expect you boffins knew but then that's why it'll be you lot representing RailUK on the next model railway-themed edition of University Challenge...

20220403_174836.jpg
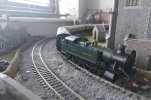
Here's a photo of one of the first engines to be tested - 6110, a GWR Large Prairie, rounding the inner loop and heading past the church. It made quite a nice scene, I thought, as it was heading between the green spaces of Little Piddling and the church, though I couldn't quite capture that on camera. This is close though:
I tried to match some of the engines up to realistic coaching formations (well, coaches which didn't look too out of place behind a given loco), but not all. This time it was the Prairie and three Hornby RailRoad GWR coaches.

20220414_093906.jpg
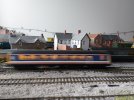
Jumping forward a few days, to the DCC engines. And this one isn't even an engine - it's a unit - but it's close enough. ;)
This photo really shows how quick a Class 121 can go - about walking pace, I think it was...

20220414_093908.jpg
If these photos aren't going to get me a place working for Railway Modeller, I don't know what will :lol:
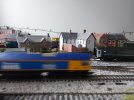
Here we have the biggest pain in the proverbial of all the fleet: Hornby's 66731 Capt. Tom Moore. It looks lovely, despite being from what would once have been the RailRoad range, but the motor is a bit rubbish. I don't know if it's exactly the same as the old Lima 'pancake' motors from when this would have been produced by Lima, but it's certainly similar in external appearance. I put an old Hornby Class 43 power car weight in the non-motor end of this when I got it, to help it run better - that helped marginally when it came to running it this week. I think the issue was it hadn't run in quite some time and the motor just needed to get going, and the wheels needed a bit of a clean, before it would co-operate.

20220414_093902.jpg
Speaking of cleaning wheels...
Here's this fancy wheel-cleaning gadget I got sometime last year from Woodland Scenics, I believe. It's a super thing - it's essentially a rolling road, but without the rollers (so a road, then). It's got two rails for the wheels to pick up power from, but then on the outer edges of the rails there are the cleaning bits. You can have either Velcro-type cleaning things (which are more abrasive, and are the ones I've got on at the moment), or some more gentle white pads. This also works well to just get the engines' wheels turning as the way it works - having the engine buffer-up to the end of the track and then keep running - is a bit like a very basic rolling road.
I thought this photo had a look of Swindon Works about it - if you ignore literally everything apart from the engine's wheels spinning round quickly whilst it's stood still. ;)

20220414_093931.jpg
Here's a slightly better photo which makes it look like the engine is travelling at speed. All you need to ignore is the fact that at this point, the engine would have been in reverse, and the fact that you can see it's not travelling on normal tracks based on the fact that there aren't any sleepers under the front bogie (pony?)!


So there we go - some photos of the layout (finally). Actually, whilst I'm here, here are some more photos of the layout in the state it's currently in, for those of you who are interested:
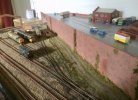
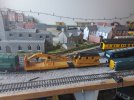
20220414_155038.jpg20220414_155055.jpg20220414_155546.jpg

Thanks for reading. :)

-Peter
 
Last edited:
Status
Not open for further replies.

Top