• Our new ticketing site is now live! Using either this or the original site (both powered by TrainSplit) helps support the running of the forum with every ticket purchase! Find out more and ask any questions/give us feedback in this thread!

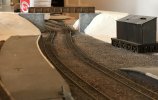
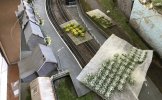
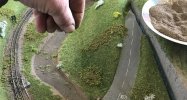
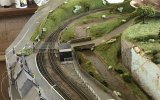
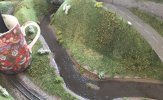
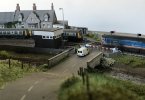
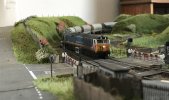
Lapford station in N gauge.

Status
Not open for further replies.

Peter C

Established Member
Joined
13 Oct 2018
Messages
4,638
Location
GWR land
It should work fine really because the point of strain would be lower down due to the cant if you get what I mean?
I just packed mine out with plasticard until it looked about right and I’ve run some long (twelve coach) trains through it without any problems.
It would look amazing on your long sweeping curves though I must say...
Using plasticard is a good way of doing super-elevation. @reddragon may also be interested in using cork underlay, cut into strips around an inch long, which works well too.

-Peter :)
 
Sponsor Post - registered members do not see these adverts; click here to register, or click here to log in
R

RailUK Forums

Gloster

Established Member
Joined
4 Sep 2020
Messages
10,928
Location
Up the creek
That makes a lot of sense but it’s still a new bit of learning for me. I did read somewhere recently that there were other similar ones around but I don’t know where I read it.

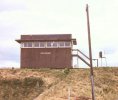
A quick skim through the Signalling Record Society’s GWR Signal Box Register (the 1980s paper version) produces 34 locations which had Plywood Wonders. Seven structures are known to have been used at two locations, including one that didn’t open at the original one, but others may have been subject to a move that wasn’t recorded, or just were of parts that had been taken out of store. They were spread all over the WR, but not in Cornwall or the West Midlands, and seem to have been most common in the London area and South Wales. I may have missed one or two as I don’t have every section of the register, if they were ever produced.
 
Last edited:

Ashley Hill

Established Member
Joined
8 Dec 2019
Messages
4,235
Location
The West Country
A quick skim through the Signalling Record Society’s GWR Signal Box Register (the 1980s paper version) produces 34 locations which had Plywood Wonders. Seven structures are known to have been used at two locations, including one that didn’t open at the original one, but others may have been subject to a move that wasn’t recorded, or just were of parts that had been taken out of store. They were spread all over the WR, but not in Cornwall or the West Midlands, and seem to have been most common in the London area and South Wales. I may have missed one or two as I don’t have every section of the register, if they were ever produced.

Evesham IIRC is still in use and I think there's still one in west Wales. Daintons plywood wonder can be seen just down the road from Westbury station in the boat club opposite the pub. It can also be seen from the avoider.
 

Gloster

Established Member
Joined
4 Sep 2020
Messages
10,928
Location
Up the creek
Evesham IIRC is still in use and I think there's still one in west Wales. Daintons plywood wonder can be seen just down the road from Westbury station in the boat club opposite the pub. It can also be seen from the avoider.
Evesham was the first Plywood Wonder to be opened, on 9 March 1957, while the structure at Whitland was previously at Danygraig. I think that these are the only two still functioning as signal boxes.
 

Peter C

Established Member
Joined
13 Oct 2018
Messages
4,638
Location
GWR land
Evesham IIRC is still in use and I think there's still one in west Wales. Daintons plywood wonder can be seen just down the road from Westbury station in the boat club opposite the pub. It can also be seen from the avoider.
Evesham was the first Plywood Wonder to be opened, on 9 March 1957, while the structure at Whitland was previously at Danygraig. I think that these are the only two still functioning as signal boxes.
I can confirm that Evesham box is still in use - https://photos.signalling.org/index?/category/272-evesham shows the lever-frame in 2008 and the newer design of panel in 2012. As another (somewhat) interesting point, I would assume it still has some form of old absolute-block signalling equipment, in order to interface with Moreton 'box down the line, as at Ascott.

-Peter
 

Cowley

Forum Staff
Staff Member
Global Moderator
Joined
15 Apr 2016
Messages
17,384
Location
Devon
Evesham was the first Plywood Wonder to be opened, on 9 March 1957, while the structure at Whitland was previously at Danygraig. I think that these are the only two still functioning as signal boxes.

It’s interesting to see that Evesham still has the little canopy over the window which Eggesford lost sometime in the mid 80s (which made it easier to model actually).

Edit - Just realised that the box at Exeter City Basin junction was one of these too. Photo from the Cornwall Railway Society site:

C2477263-85F1-4F55-AAAB-A605BB3202A6.jpeg
 

Gloster

Established Member
Joined
4 Sep 2020
Messages
10,928
Location
Up the creek
It’s interesting to see that Evesham still has the little canopy over the window which Eggesford lost sometime in the mid 80s (which made it easier to model actually).

Edit - Just realised that the box at Exeter City Basin junction was one of these too. Photo from the Cornwall Railway Society site:
The canopy was a standard part of the design and was intended to reduce glare, but (if I remember correctly) at Eggesford the signalmen asked for it to be removed as the box faced a hill and there was no need for that. Apparently, the canopy did have a propensity to direct water down their necks when going out to change tokens.

I can confirm that Evesham box is still in use - https://photos.signalling.org/index?/category/272-evesham shows the lever-frame in 2008 and the newer design of panel in 2012. As another (somewhat) interesting point, I would assume it still has some form of old absolute-block signalling equipment, in order to interface with Moreton 'box down the line, as at Ascott.

-Peter
For many years the sections either side of Evesham (to Moreton and to Norton Junction) were single-line operated by key tokens. However, a few years ago the section to Moreton was redoubled and I am not sure whether they converted it to Track Circuit Block, still controlled from the existing boxes. The method of working to Norton may also have been changed. (I could look at the Sectional Appendix to check, but that takes ages.)
 

Cowley

Forum Staff
Staff Member
Global Moderator
Joined
15 Apr 2016
Messages
17,384
Location
Devon
The canopy was a standard part of the design and was intended to reduce glare, but (if I remember correctly) at Eggesford the signalmen asked for it to be removed as the box faced a hill and there was no need for that. Apparently, the canopy did have a propensity to direct water down their necks when going out to change tokens.


For many years the sections either side of Evesham (to Moreton and to Norton Junction) were single-line operated by key tokens. However, a few years ago the section to Moreton was redoubled and I am not sure whether they converted it to Track Circuit Block, still controlled from the existing boxes. The method of working to Norton may also have been changed. (I could look at the Sectional Appendix to check, but that takes ages.)

Much appreciating all this detail @Gloster, thanks very much.
 

Peter C

Established Member
Joined
13 Oct 2018
Messages
4,638
Location
GWR land
For many years the sections either side of Evesham (to Moreton and to Norton Junction) were single-line operated by key tokens. However, a few years ago the section to Moreton was redoubled and I am not sure whether they converted it to Track Circuit Block, still controlled from the existing boxes. The method of working to Norton may also have been changed. (I could look at the Sectional Appendix to check, but that takes ages.)
That was 2011 when they redoubled parts of the line (they also did Ascott-Charlbury Junction). Just had a look at the Sectional Appendix and the double-track section is Track Circuit Block in areas controlled by Ascott and Evesham, and then Absolute Block in the area controlled by Moreton. :)

-Peter
 

Gloster

Established Member
Joined
4 Sep 2020
Messages
10,928
Location
Up the creek
That was 2011 when they redoubled parts of the line (they also did Ascott-Charlbury Junction). Just had a look at the Sectional Appendix and the double-track section is Track Circuit Block in areas controlled by Ascott and Evesham, and then Absolute Block in the area controlled by Moreton. :)

-Peter
I think, although I haven’t had time to check thoroughly, that Evesham’s station limits extend to beyond Honeybourne and there may be an arrangement, possibly with axle-counters, so that Evesham can give Train Out of Section to Moreton for Down trains once they have arrived at Honeybourne as it is still basically Absolute Block between the two. (Sir Humphrey would be proud of that sentence.) It is probably possible for a second Up train to proceed as far as a signal at Honeybourne while a previous one is between there and Moreton. It may be called Track Circuit Block by Network Rail, but it seems to me to be Absolute Block with track circuiting through stations limits, which have been extended.

It is no longer token working between Evesham and Norton Junction as it seems now to be an arrangement using Acceptance Switches and axle-counters.
 

Peter C

Established Member
Joined
13 Oct 2018
Messages
4,638
Location
GWR land
I think, although I haven’t had time to check thoroughly, that Evesham’s station limits extend to beyond Honeybourne and there may be an arrangement, possibly with axle-counters, so that Evesham can give Train Out of Section to Moreton for Down trains once they have arrived at Honeybourne as it is still basically Absolute Block between the two. (Sir Humphrey would be proud of that sentence.) It is probably possible for a second Up train to proceed as far as a signal at Honeybourne while a previous one is between there and Moreton. It may be called Track Circuit Block by Network Rail, but it seems to me to be Absolute Block with track circuiting through stations limits, which have been extended.

It is no longer token working between Evesham and Norton Junction as it seems now to be an arrangement using Acceptance Switches and axle-counters.
I would never have known all of that - thanks for explaining. I need some sort of confused Jim Hacker GIF... ;)

-Peter
 

Cowley

Forum Staff
Staff Member
Global Moderator
Joined
15 Apr 2016
Messages
17,384
Location
Devon
Not mine as such but I had a very pleasant evening doing the road markings on my friends railway this evening.
Stuff like this really brings a model to life. Still lots to do but it’s getting there.

F34EAA9F-6D49-45AF-B87A-71CAA1D9DCAA.jpeg
 

Peter C

Established Member
Joined
13 Oct 2018
Messages
4,638
Location
GWR land
Not mine as such but I had a very pleasant evening doing the road markings on my friends railway this evening.
Stuff like this really brings a model to life. Still lots to do but it’s getting there.

View attachment 94342
Now those look very nice @Cowley - I agree with you that they really add to the scene. Much like the road markings on your layout!

-Peter
 

Cowley

Forum Staff
Staff Member
Global Moderator
Joined
15 Apr 2016
Messages
17,384
Location
Devon
Now those look very nice @Cowley - I agree with you that they really add to the scene. Much like the road markings on your layout!

-Peter

Thanks Peter. It’s the same method but they look decent if you put the effort into doing them individually like that.
 

Peter C

Established Member
Joined
13 Oct 2018
Messages
4,638
Location
GWR land
Thanks Peter. It’s the same method but they look decent if you put the effort into doing them individually like that.
You're very welcome :) I'll definitely be using your technique when I come to do my own road markings.

-Peter
 

Cowley

Forum Staff
Staff Member
Global Moderator
Joined
15 Apr 2016
Messages
17,384
Location
Devon
Excellent work! Those road markings look excellent!

When you come around to doing greenery can you give us a commentary on that please as that's something I need to learn. Do you do it straight on to your layer of cork?

Thought I’d do something a bit different for 10000th post.
10000? How on earth did that happen?
Weirdly it was exactly five years since I joined on Thursday too...

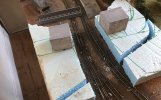
I’m going to give you a bit of a run down of how I’m going to turn this little section here:

5207FDA9-2348-4405-A40C-76B248D3D7B1.jpeg

Into something resembling scenery.
Those blocks are a pair of bridge abutments that I made which will be incorporated into a hill with a backscene to hide where the railway disappears into the fiddle yard.

Now this is just how I do things of course and other people will have their own methods but this works fine for me.
I’ll have to do this in a few bites due to the photo limit probably but here goes. ;)

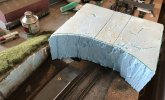
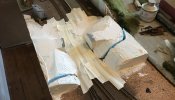
So first of all here’s an off cut of a celatex type insulation board which I nabbed out of a skip on a site I was working on. It’s lightweight, easy to cut and best of all. Free!

EFB52B7C-15EA-479E-ADB1-D3A87AEB26B3.jpeg3CE10012-99F5-4C8B-A4DD-78FE424D72A8.jpeg

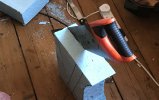
You’ll see that I’ve cut an approximate shape and then measured the height of the bridge abutments against it before cutting through it horizontally to get it to the right height.
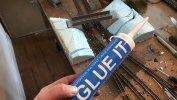
Once that was done I placed the bridge parts on top and drew out the areas that needed removing. The slot going across is to eventually hold the backscene. I used a kitchen knife to chop down into it at this point and I did it on top of another bit of insulation so that I didn’t stab the floor.
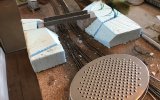
The cheese grater is being readied for its very important job...

0ADE7C0F-AE33-4D5B-AE63-C5A973723CD8.jpeg1411ABB6-D60D-40BB-95ED-304B1E177CA1.jpeg

Ok next.
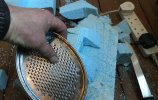
I’ve taken the pieces back off and graded everything with my Acme cheese grader, again on the edge of another bit of insulation so I don’t damage anything.
Then it’s all glued into place:

254647A0-4A92-414D-96AA-982170F9BE66.jpegF39F5C99-C227-47F1-BA44-EAB404672EBF.jpeg

Which has got me to this point:

C7DFFBEF-FA64-4703-BC8D-6ECBFAB8F0A1.jpeg

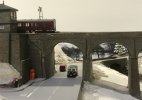
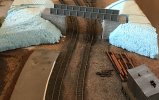
It’s starting to look like something now. The bridge is a 3D printed one that I bought off eBay for about six quid delivered and I plan to make it look as rusty as possible. Love a bit of decay. ;)
Right, all of that took almost as long to write out as it did to actually do.
I think it took about an hour and it was quite enjoyable. You can do large bits of scenery this way quite easily.
Hopefully with the photos it’ll all make sense and next I’ll get it up to the painted stage ready to be grassed.

Thanks for reading. :)
 

Peter C

Established Member
Joined
13 Oct 2018
Messages
4,638
Location
GWR land
Wow - 10,000 posts. That's really quite something! :D

As is to be expected when reading about Lapford and Eggishford, you've done a really good job on that so far @Cowley. The insulation board looks to be a very good way of making the landscape you want. I saw someone on YouTube had a fancy tool which would cut through polystyrene to make good hills I think:
(31 mins in).
Marking out space to cut out and then put the bridge abutments in makes them look so much better as part of the scene; I expect it's easier to make put them into the scene rather than trying to put the scenery around the abutments!
That bridge section over the tracks looks really nice as well. It just goes to show how far 3D-printing has come in the past few years: people are making entire engine and wagon bodies from it now! Detailing it and making it look really worn and used is going to look brilliant. I've mentioned before that one of the first things I think of when someone says "BR" is decay and worn-down bits and bobs and that bridge would fit well into that!

-Peter
 

Cowley

Forum Staff
Staff Member
Global Moderator
Joined
15 Apr 2016
Messages
17,384
Location
Devon
Wow - 10,000 posts. That's really quite something! :D

As is to be expected when reading about Lapford and Eggishford, you've done a really good job on that so far @Cowley. The insulation board looks to be a very good way of making the landscape you want. I saw someone on YouTube had a fancy tool which would cut through polystyrene to make good hills I think:
(31 mins in).
Marking out space to cut out and then put the bridge abutments in makes them look so much better as part of the scene; I expect it's easier to make put them into the scene rather than trying to put the scenery around the abutments!
That bridge section over the tracks looks really nice as well. It just goes to show how far 3D-printing has come in the past few years: people are making entire engine and wagon bodies from it now! Detailing it and making it look really worn and used is going to look brilliant. I've mentioned before that one of the first things I think of when someone says "BR" is decay and worn-down bits and bobs and that bridge would fit well into that!

-Peter

I can’t seem to get that link to work for some reason?
I quite like the idea of a fancy tool for cutting the stuff, although I don’t think I’ll have much to do after this bit for a while...

OK time for the next bit...

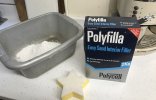
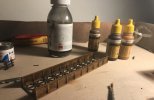
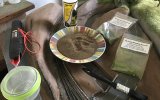
Here’s the tools to do it:

5EC86557-DD93-4483-BFAD-02F58D8C9FC2.jpeg

When I did the original Lapford section I used plaster of paris and and matting over the hills because I was worried about getting cracks over time, but because I have very solid boards with decent frames I’ve stopped bothering with that now and I just use that Polyfiller in the photo.
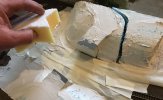
I found the sponge in the bathroom cabinet and I think it belongs to one of the girls but it’s a damn fine sponge for getting into the corners so I’m using it for a greater purpose. :lol:

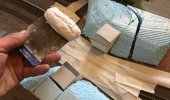
I’ve put masking tape over the bits I want to keep clean here and I always use these types of filling tools for stuff like this (I use them at work too as they’re much better at shaping things than the ones with handles in my opinion. Really cheap too from Toolstation/Screwfix).

F2EFD9BC-6590-413F-AC39-93477DB206BF.jpegE8FD9661-4280-4F40-9D87-C1B75B87C340.jpeg

That’s the filling done and time to smooth it down (especially where it meets the ground) with my lovely new sponge:
4BE2FF3D-883B-4705-B027-79CB3E490F27.jpeg

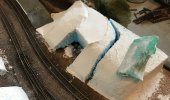
It needed a good 24 hours to dry out as some of it behind the platform was actually quite thick, but once it was dry I gave it a quick sand and coated it with a PVA and water mix that will soak in and give it extra strength:

FD98D152-CF1A-4409-959F-F8C00CA488B6.jpeg28952731-3544-4DA2-AA66-51E74B1B38A3.jpeg

I’ve also skimmed filler over the last of the cork at ground height to make it smooth.
The filler that I’ve used is really easy to sand (the clue’s on the box actually ;)), but it sets very well over time if you use it the way I have.

While it was drying out I spent a bit of time working on the bridge to make it as rusty looking as I could:

428CCC88-40C3-4F81-BB7F-4794F1F9FDD2.jpeg

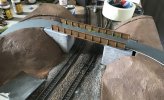
Here it is in place to get a feel of how it’ll all look:

2C0598C7-2066-43E8-9AB8-2CDC9D9B675D.jpeg

I’m pretty happy with the whole scene now (which is lucky), so it’s time to paint what I’ve made (again using Mig paint - ‘brown soil’ mixed with ‘earth’) and we’re nearly at the point of being able to do the grass now:

B10DE90C-98B9-4800-9F91-63ADA558CEB3.jpeg

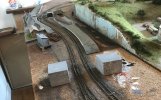
All painted and a roadway made out of grey card. I’ve made it so that I can lift the girder bridge out for easy maintenance of the points that are underneath:

C876A025-0C3A-476B-B691-C85617B6636A.jpeg

That’s it for the moment. I’m doing the grass at the moment and it’s drying while I write this but I’ll post the photos of that when it’s done.

:)
 

Peter C

Established Member
Joined
13 Oct 2018
Messages
4,638
Location
GWR land
That's annoying re: link - I'll try it again:

What you've done there @Cowley makes it look really good. I'd agree with regards to use of the sponge! That looks like a much easier way of getting the Pollyfilla onto the hill than what I might have come up with. :)
The bridge bit has a lot of detail to it, doesn't it? The weathered effect you've given it makes it more realistic: as does the little bit of greenery on the edge of the road. It really is the little things on a layout which make it come to life and make it feel 'lived in'.

-Peter
 

Iskra

Established Member
Joined
11 Jun 2014
Messages
9,283
Location
West Riding
Thanks very much for the excellent walk through on the scenery :)

Your layout is really taking shape and you've done a great job on the bridge weathering too!
 

Cowley

Forum Staff
Staff Member
Global Moderator
Joined
15 Apr 2016
Messages
17,384
Location
Devon
That's annoying re: link - I'll try it again:

What you've done there @Cowley makes it look really good. I'd agree with regards to use of the sponge! That looks like a much easier way of getting the Pollyfilla onto the hill than what I might have come up with. :)
The bridge bit has a lot of detail to it, doesn't it? The weathered effect you've given it makes it more realistic: as does the little bit of greenery on the edge of the road. It really is the little things on a layout which make it come to life and make it feel 'lived in'.

-Peter

That’s an excellent tool. I really could have done with that at times. :lol:
Thanks for your comments, re the polyfiller - I did use the scraper to get it all over the scenery and roughly shape it. The sponge is useful for getting it smooth and getting rid of the lines though.


Thanks very much for the excellent walk through on the scenery :)

Your layout is really taking shape and you've done a great job on the bridge weathering too!

No problem at all and like I say it’s just my way of doing it. Sometimes you just need to bite the bullet and dive in.
Looking back at your original post that I was replying to you actually asked about the grass which is where I’ve got to today (I actually started it last night really but I got most of it done today).

So here goes...

This what I’m starting with. That’s three different blends of grass - The same ones that I’ve used over all of the railway.
Decent quality static grass glue, a cheap static wand that I bought off eBay and I bowl of baked and sieved soil from the garden that is almost like dust but will come in really us

B5778F8E-1FAD-4896-AE89-1F2E2858A57B.jpeg

I’m only doing a section or two at a time as the glue can go off really quickly.
I generally mix the colour I want and go over it once, then I’ll refill the wand container and go over it again with a slightly different shade to fill any gaps.
First bit going on:

30FF186E-2BA3-40DA-A4B2-BA4414EA7638.jpeg

Then building it up:

07198AEE-2954-41DE-B88C-25D9789D8D6C.jpeg

As it’s drying I’m sprinkling some of the soil dust from high up to settle into the glue underneath the grass just to give it a bit more texture.

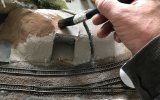
Because I had all kinds of different lengths of grass once it was all dry this morning I set about it with some beard trimmers to get it down to a suitable N gauge length...

A2EB95A3-41E7-4271-AEF2-953BCA9A33F3.jpeg

So that’s the grass pretty much done for the time being and it’s time to add some bushes, flowers etc.
Mainly I want things like Cow Parsley and Rhododendrons around this area as that’s what you see in summer photos from back in the day.
I bought a load of peel off stuff for Lapford and still had some left so I used it up here by making clumps of things and also adding some to the river.
This sort stuff basically:

CFB8145A-3BF7-4BB1-8028-4473C5BE3D0D.jpeg

I also added some Woodland Scenics light coloured fine turf in patches all over the place to give it a bit more texture and again sprinkled some of the soil in to soak into the glue. I even sprayed a little bit of water onto the odd bit to help it bond together:

3A71F70F-3297-44B7-8737-7E3752D27548.jpeg

Behind the platform where the river is I’ve planted darker bushes and kept the ground with more soil than greenery because I want to lose the river disappearing into a load of trees and shadows:

4D882E99-7ADD-450D-9AB1-2F5BA0C8B16A.jpeg

It was rapidly coming together at this point though so I left it to dry for a bit as I didn’t damage anything that wasn’t dry.

When I came back to it a bit later I made a load of fencing up out of painted wire and gave it all a tidy up.
After it was hoovered I watered down some of the Mig ‘earth’ coloured paint and brushed it over some quite large areas of the grass. It looks awful at first but when it soaks in you start to get quite a nice variation of colour tone and it looks good. I also dabbed a bit on the Cow Parsley to tone the white down a bit:

2C75AE9A-E036-45C9-8132-C441430D0C00.jpeg

After this I picked out some of the flowers in a rhododendron hue that I mixed up, varnished the river again and decided to leave everything for the night in case I dropped something on the river!

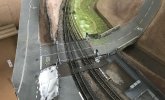
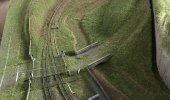
Here’s how I left it tonight, tomorrow I’ll start adding some trees but in such a way that I don’t block off some of the views I like.

F7E1594C-8BDE-4BF4-B816-B8108A310249.jpeg0329A285-3CC4-4DF2-A7FB-063BE5991C07.jpeg

That’s the 50 and the DMU getting a run out through the new bit.
 

Peter C

Established Member
Joined
13 Oct 2018
Messages
4,638
Location
GWR land
That’s an excellent tool. I really could have done with that at times. :lol:
Thanks for your comments, re the polyfiller - I did use the scraper to get it all over the scenery and roughly shape it. The sponge is useful for getting it smooth and getting rid of the lines though.
It is a clever little thing. :)
You're very welcome: a few simple tools can really make some lovely scenery.

So here goes...

This what I’m starting with. That’s three different blends of grass - The same ones that I’ve used over all of the railway.
Decent quality static grass glue, a cheap static wand that I bought off eBay and I bowl of baked and sieved soil from the garden that is almost like dust but will come in really us

View attachment 94597

I’m only doing a section or two at a time as the glue can go off really quickly.
I generally mix the colour I want and go over it once, then I’ll refill the wand container and go over it again with a slightly different shade to fill any gaps.
First bit going on:

View attachment 94586

Then building it up:

View attachment 94587

As it’s drying I’m sprinkling some of the soil dust from high up to settle into the glue underneath the grass just to give it a bit more texture.

Because I had all kinds of different lengths of grass once it was all dry this morning I set about it with some beard trimmers to get it down to a suitable N gauge length...

View attachment 94589

So that’s the grass pretty much done for the time being and it’s time to add some bushes, flowers etc.
Mainly I want things like Cow Parsley and Rhododendrons around this area as that’s what you see in summer photos from back in the day.
I bought a load of peel off stuff for Lapford and still had some left so I used it up here by making clumps of things and also adding some to the river.
This sort stuff basically:

View attachment 94591

I also added some Woodland Scenics light coloured fine turf in patches all over the place to give it a bit more texture and again sprinkled some of the soil in to soak into the glue. I even sprayed a little bit of water onto the odd bit to help it bond together:

View attachment 94593

Behind the platform where the river is I’ve planted darker bushes and kept the ground with more soil than greenery because I want to lose the river disappearing into a load of trees and shadows:

View attachment 94594

It was rapidly coming together at this point though so I left it to dry for a bit as I didn’t damage anything that wasn’t dry.

When I came back to it a bit later I made a load of fencing up out of painted wire and gave it all a tidy up.
After it was hoovered I watered down some of the Mig ‘earth’ coloured paint and brushed it over some quite large areas of the grass. It looks awful at first but when it soaks in you start to get quite a nice variation of colour tone and it looks good. I also dabbed a bit on the Cow Parsley to tone the white down a bit:

View attachment 94595

After this I picked out some of the flowers in a rhododendron hue that I mixed up, varnished the river again and decided to leave everything for the night in case I dropped something on the river!

Here’s how I left it tonight, tomorrow I’ll start adding some trees but in such a way that I don’t block off some of the views I like.

View attachment 94601View attachment 94596

That’s the 50 and the DMU getting a run out through the new bit.
Using a beard trimmer (surely a 'strimmer' if it's cutting grass... ;)) is a funny but effective way of cutting down the grass. How do you use it in such a way that it doesn't flatten the grass you're cutting?
Those shots of the 50 and the DMU in the scenery look really nice. The colours the flowers add make the scene look just like some time in mid-Summer. :)

-Peter
 

reddragon

Established Member
Joined
24 Mar 2016
Messages
3,213
Location
Churn (closed)
I can’t seem to get that link to work for some reason?
I quite like the idea of a fancy tool for cutting the stuff, although I don’t think I’ll have much to do after this bit for a while...

OK time for the next bit...

Here’s the tools to do it:

View attachment 94541

When I did the original Lapford section I used plaster of paris and and matting over the hills because I was worried about getting cracks over time, but because I have very solid boards with decent frames I’ve stopped bothering with that now and I just use that Polyfiller in the photo.
I found the sponge in the bathroom cabinet and I think it belongs to one of the girls but it’s a damn fine sponge for getting into the corners so I’m using it for a greater purpose. :lol:

I’ve put masking tape over the bits I want to keep clean here and I always use these types of filling tools for stuff like this (I use them at work too as they’re much better at shaping things than the ones with handles in my opinion. Really cheap too from Toolstation/Screwfix).

View attachment 94542View attachment 94543

That’s the filling done and time to smooth it down (especially where it meets the ground) with my lovely new sponge:
View attachment 94544

It needed a good 24 hours to dry out as some of it behind the platform was actually quite thick, but once it was dry I gave it a quick sand and coated it with a PVA and water mix that will soak in and give it extra strength:

View attachment 94545View attachment 94546

I’ve also skimmed filler over the last of the cork at ground height to make it smooth.
The filler that I’ve used is really easy to sand (the clue’s on the box actually ;)), but it sets very well over time if you use it the way I have.

While it was drying out I spent a bit of time working on the bridge to make it as rusty looking as I could:

View attachment 94550

Here it is in place to get a feel of how it’ll all look:

View attachment 94547

I’m pretty happy with the whole scene now (which is lucky), so it’s time to paint what I’ve made (again using Mig paint - ‘brown soil’ mixed with ‘earth’) and we’re nearly at the point of being able to do the grass now:

View attachment 94548

All painted and a roadway made out of grey card. I’ve made it so that I can lift the girder bridge out for easy maintenance of the points that are underneath:

View attachment 94549

That’s it for the moment. I’m doing the grass at the moment and it’s drying while I write this but I’ll post the photos of that when it’s done.

:)
That is really good, gives me a good idea where to start. Must get a star shaped sponge though!!

== Doublepost prevention - post automatically merged: ==

That’s an excellent tool. I really could have done with that at times. :lol:
Thanks for your comments, re the polyfiller - I did use the scraper to get it all over the scenery and roughly shape it. The sponge is useful for getting it smooth and getting rid of the lines though.


No problem at all and like I say it’s just my way of doing it. Sometimes you just need to bite the bullet and dive in.
Looking back at your original post that I was replying to you actually asked about the grass which is where I’ve got to today (I actually started it last night really but I got most of it done today).

So here goes...

This what I’m starting with. That’s three different blends of grass - The same ones that I’ve used over all of the railway.
Decent quality static grass glue, a cheap static wand that I bought off eBay and I bowl of baked and sieved soil from the garden that is almost like dust but will come in really us

View attachment 94597

I’m only doing a section or two at a time as the glue can go off really quickly.
I generally mix the colour I want and go over it once, then I’ll refill the wand container and go over it again with a slightly different shade to fill any gaps.
First bit going on:

View attachment 94586

Then building it up:

View attachment 94587

As it’s drying I’m sprinkling some of the soil dust from high up to settle into the glue underneath the grass just to give it a bit more texture.

Because I had all kinds of different lengths of grass once it was all dry this morning I set about it with some beard trimmers to get it down to a suitable N gauge length...

View attachment 94589

So that’s the grass pretty much done for the time being and it’s time to add some bushes, flowers etc.
Mainly I want things like Cow Parsley and Rhododendrons around this area as that’s what you see in summer photos from back in the day.
I bought a load of peel off stuff for Lapford and still had some left so I used it up here by making clumps of things and also adding some to the river.
This sort stuff basically:

View attachment 94591

I also added some Woodland Scenics light coloured fine turf in patches all over the place to give it a bit more texture and again sprinkled some of the soil in to soak into the glue. I even sprayed a little bit of water onto the odd bit to help it bond together:

View attachment 94593

Behind the platform where the river is I’ve planted darker bushes and kept the ground with more soil than greenery because I want to lose the river disappearing into a load of trees and shadows:

View attachment 94594

It was rapidly coming together at this point though so I left it to dry for a bit as I didn’t damage anything that wasn’t dry.

When I came back to it a bit later I made a load of fencing up out of painted wire and gave it all a tidy up.
After it was hoovered I watered down some of the Mig ‘earth’ coloured paint and brushed it over some quite large areas of the grass. It looks awful at first but when it soaks in you start to get quite a nice variation of colour tone and it looks good. I also dabbed a bit on the Cow Parsley to tone the white down a bit:

View attachment 94595

After this I picked out some of the flowers in a rhododendron hue that I mixed up, varnished the river again and decided to leave everything for the night in case I dropped something on the river!

Here’s how I left it tonight, tomorrow I’ll start adding some trees but in such a way that I don’t block off some of the views I like.

View attachment 94601View attachment 94596

That’s the 50 and the DMU getting a run out through the new bit.
You do make it look easy and the finish is better than I have done before. I shall have to make a start.
 

Cowley

Forum Staff
Staff Member
Global Moderator
Joined
15 Apr 2016
Messages
17,384
Location
Devon
It is a clever little thing. :)
You're very welcome: a few simple tools can really make some lovely scenery.


Using a beard trimmer (surely a 'strimmer' if it's cutting grass... ;)) is a funny but effective way of cutting down the grass. How do you use it in such a way that it doesn't flatten the grass you're cutting?
Those shots of the 50 and the DMU in the scenery look really nice. The colours the flowers add make the scene look just like some time in mid-Summer. :)

-Peter

Thanks Peter.
The grass tends to stick bolt upright to the land, even on hills, so if you look at it on the side of a slope it’s often pointing in the wrong direction if you get what I mean, but it will take being strimmed ;) without falling over because it sets quickly.


That is really good, gives me a good idea where to start. Must get a star shaped sponge though!!

== Doublepost prevention - post automatically merged: ==


You do make it look easy and the finish is better than I have done before. I shall have to make a start.

I hope it was helpful. I think things are a lot easier now than they were when we were doing this stuff in our youth.
 

Peter C

Established Member
Joined
13 Oct 2018
Messages
4,638
Location
GWR land
Thanks Peter.
The grass tends to stick bolt upright to the land, even on hills, so if you look at it on the side of a slope it’s often pointing in the wrong direction if you get what I mean, but it will take being strimmed ;) without falling over because it sets quickly.
Ah OK - thanks for the explanation. I might try that technique when I come to doing my static grass - it looks straightforward enough! :D

-Peter
 

Iskra

Established Member
Joined
11 Jun 2014
Messages
9,283
Location
West Riding
That's an amazing guide you have put together for us and it's a very professional finished you've managed, thanks very much!

Beyond trees and bushes, what else do you have left to do? It's looking like the real world now :)
 

Cowley

Forum Staff
Staff Member
Global Moderator
Joined
15 Apr 2016
Messages
17,384
Location
Devon
That's an amazing guide you have put together for us and it's a very professional finished you've managed, thanks very much!

Beyond trees and bushes, what else do you have left to do? It's looking like the real world now :)

Thanks @Iskra. :)
Remaining stuff to do is things like lights for the buildings, road signs, telegraph poles, and just general bits and bobs like that which are fun to do and make a big difference to it.
I’ve also got to make a decision on the backscene at some point and I might tone some of the grass down a bit further as well.
Oh and I haven’t got any signals yet...
 

Peter C

Established Member
Joined
13 Oct 2018
Messages
4,638
Location
GWR land
Oh and I haven’t got any signals yet...
I'd be really interested to see how you do the signals @Cowley - the only way I've thought of doing them for my layout is by putting them in pre-ballasting, but that's not an option now considering I've got the ballast down.

-Peter
 

Cowley

Forum Staff
Staff Member
Global Moderator
Joined
15 Apr 2016
Messages
17,384
Location
Devon
I'd be really interested to see how you do the signals @Cowley - the only way I've thought of doing them for my layout is by putting them in pre-ballasting, but that's not an option now considering I've got the ballast down.

-Peter

I’ll use the Dapol motorised ones when they bring out the SR ones hopefully later this year. I only need two anyway.
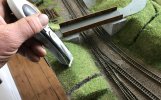
This is one of the GWR ones which they do (Lapford actually had a lower quadrant at the north end of the site but the SR ladder one on the Exeter platform was too distinctive not to have).


Just a case of drilling through the board and blending it in.
 

Peter C

Established Member
Joined
13 Oct 2018
Messages
4,638
Location
GWR land
I’ll use the Dapol motorised ones when they bring out the SR ones hopefully later this year. I only need two anyway.
This is one of the GWR ones which they do (Lapford actually had a lower quadrant at the north end of the site but the SR ladder one on the Exeter platform was too distinctive not to have).


Just a case of drilling through the board and blending it in.
Thanks for sharing the link - I'd completely forgotten about that style of signal (the way it operates/the way it's wired, not the sempahore bit ;)). I'd been thinking about getting one of these style: http://www.train-tech.com/index.php/signalling/sensor-signals-fully-automatic-signalling but the one you've linked to seems much easier to fit. Only issue being that I can't exactly drill into my board as it's on top of a table!

-Peter

(I approve of the fact that there's a lower-quadrant signal involved: proper GWR equipment that)
 
Status
Not open for further replies.

Top